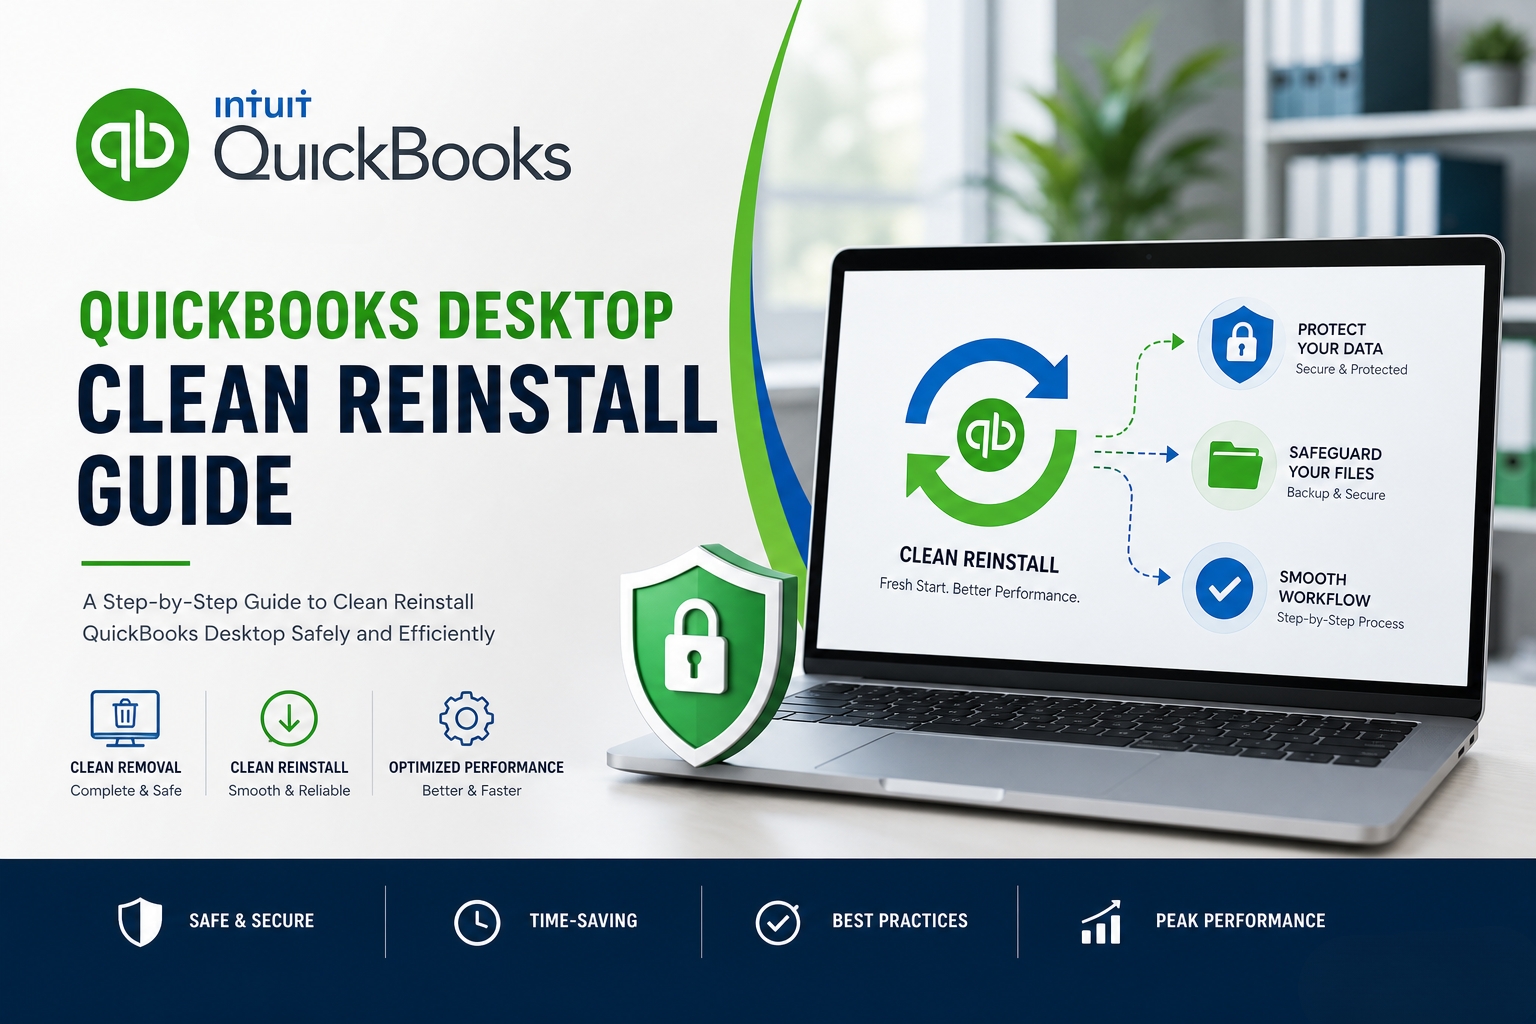
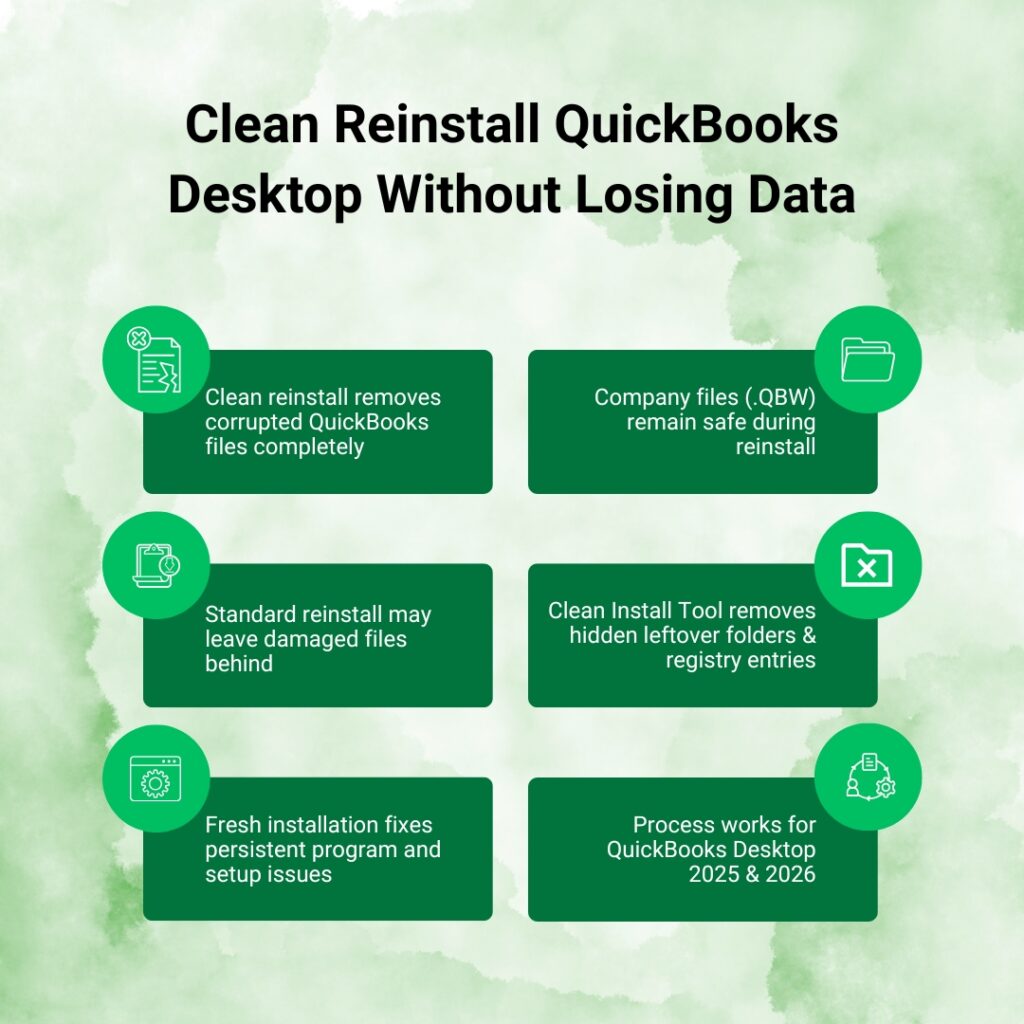
A clean reinstall of QuickBooks Desktop removes all program files and registry entries from the computer and replaces them with a fresh, working installation. The accounting data – stored in the company file with the .QBW extension – is completely separate from the QuickBooks program and is never deleted during a clean reinstall. Removing QuickBooks from the computer does not delete any of the business’s files. Only the QuickBooks program itself is removed. The company file stays exactly where it is and opens normally in the new installation.
A clean reinstall is different from a standard reinstall. A standard reinstall runs the installer over the existing installation, which leaves behind all the corrupted files, incomplete registry entries, and damaged folder structures that were causing the problem in the first place. A clean reinstall first removes everything – including the hidden leftover files that the standard uninstall misses – and then installs a completely fresh copy. The QuickBooks Clean Install Tool, developed by Intuit, performs the removal step more thoroughly than the standard Windows uninstall, specifically targeting the folders and registry entries that a standard uninstall leaves behind.
This guide covers the complete clean reinstall process for QuickBooks Desktop 2025 and QuickBooks Desktop 2024, the only versions currently available to users. As of September 30, 2024, Intuit stopped offering new subscriptions for QuickBooks Desktop 2024 and previous versions. QuickBooks Desktop 2025 is the current version available for new subscribers. Existing subscribers to older versions may still renew, but the clean reinstall process is identical across all recent versions.
Table of Contents
When a QuickBooks Desktop Clean Reinstall Is the Correct Solution?
The Clean Reinstall Solves Problems That Repairs Cannot
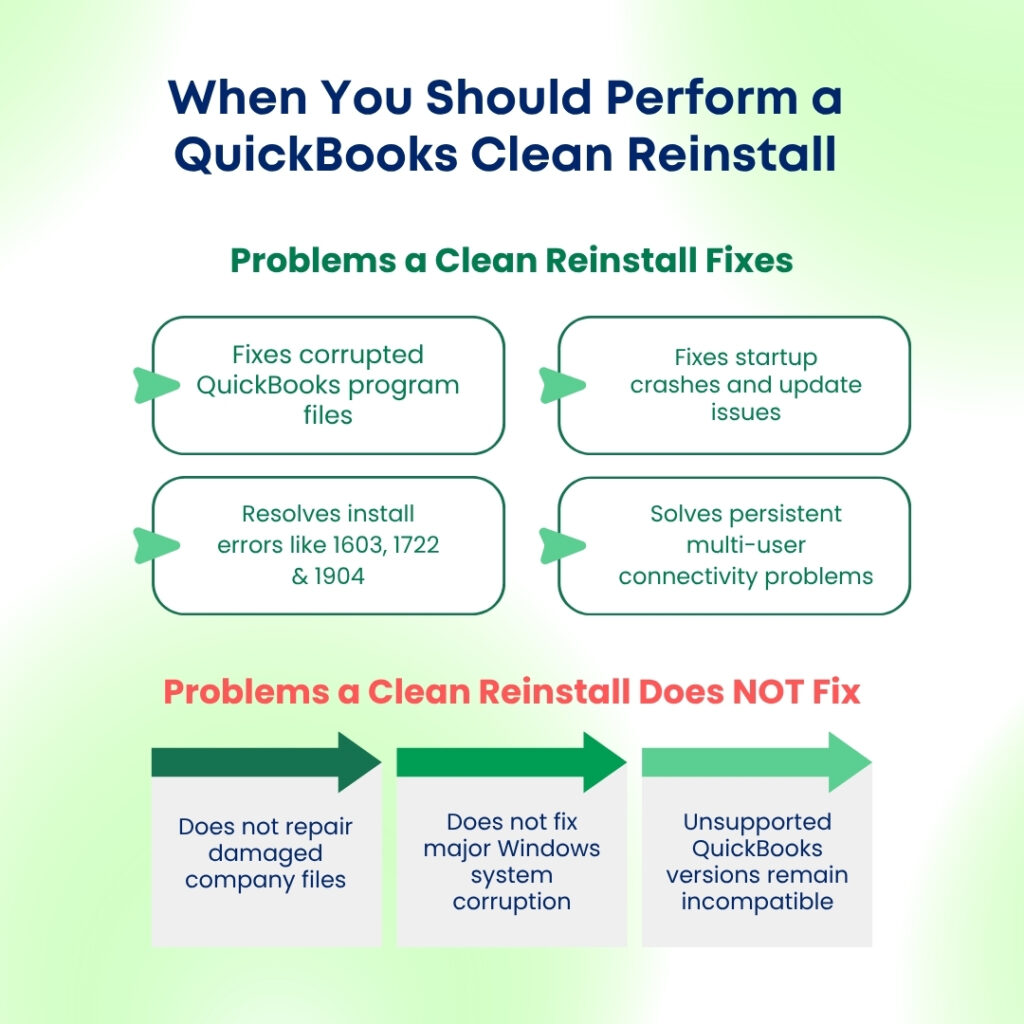
The QuickBooks Clean Install Tool is designed to resolve persistent issues with QuickBooks Desktop that simple reinstallation cannot fix. Standard reinstallation – going through the Windows Control Panel uninstall and running the installer again – leaves behind corrupted files and damaged registry entries that cause the same errors to reappear after the reinstall. A clean reinstall removes these leftover items before the new installation begins, giving the fresh QuickBooks a completely clean environment.
The specific problems that a clean reinstall resolves include: Quick
Books not opening after Windows updates, repeated installation error codes 1603, 1722, 1904, and the 6000 series (which are company file access errors), corrupted files that cause crashes on startup, multi-user connectivity failures across Pro, Premier, and Enterprise editions, and performance problems that persist even after running the QuickBooks Tool Hub repair tools. A clean reinstall is specifically recommended when all other troubleshooting options have been tried and the problem persists.
The Three Problems a Clean Reinstall Does NOT Fix
A clean reinstall fixes program-level damage. It does not fix company file damage. A company file with corrupted data – which produces symptoms like unbalanced Balance Sheets, missing transactions, or Verify Data reporting integrity loss – requires the Verify Data and Rebuild Data tools (File > Utilities > Verify Data), not a program reinstall. Running a clean reinstall on a program problem that is actually a data problem wastes time and does not resolve the issue.
A clean reinstall also does not fix Windows-level problems that are deeper than the QuickBooks installation. If the Windows Installer service is disabled, the Windows registry has severe structural damage, or the Windows operating system itself has corrupted system files, a clean reinstall of QuickBooks will fail with the same errors. The Windows System File Checker (sfc /scannow in an administrator Command Prompt) addresses Windows-level file damage before a QuickBooks clean reinstall is attempted. Finally, a clean reinstall does not resolve issues caused by running an unsupported version – QuickBooks Desktop 2021 and older are not compatible with Windows 11 and cannot be made to work through any reinstall process.
Before Starting: Everything to Gather and Confirm
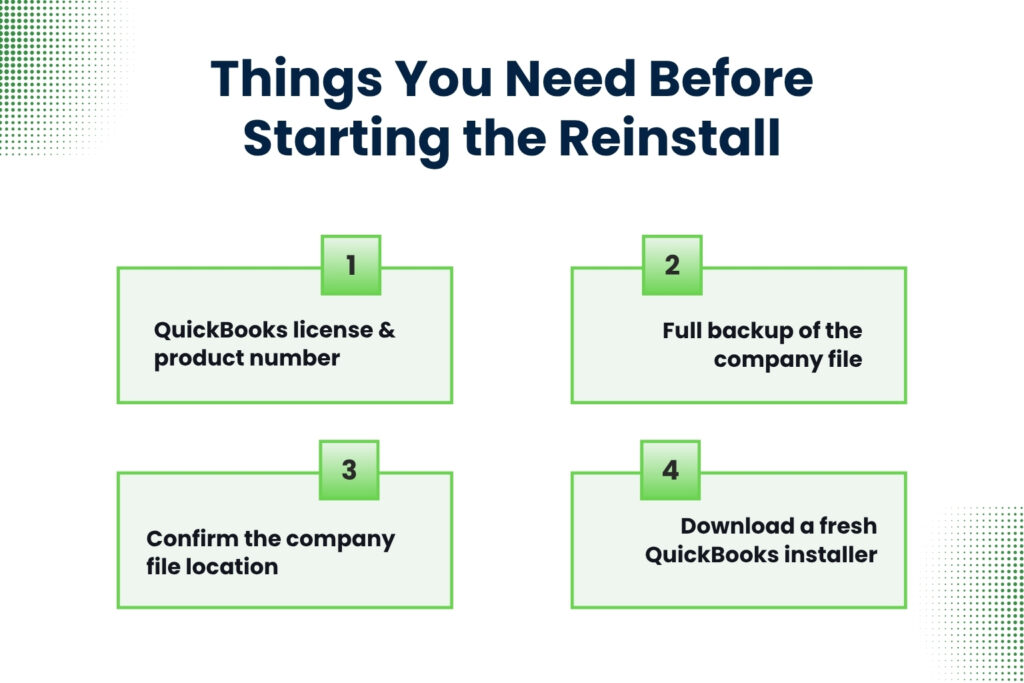
Item 1: The QuickBooks License Number and Product Number
The license number and product number are required to activate QuickBooks after the reinstall. QuickBooks will not open past the activation screen without both. The license number is a 16-digit code and the product number is a separate 6-digit code. Find them in one of three places: press F2 (or Ctrl + 1) inside QuickBooks before uninstalling to open the Product Information window, which displays both numbers at the top; check the original purchase confirmation email from Intuit; or log in to the Intuit Customer Account Management Portal at camps.intuit.com, go to Products & Services, and click Details next to each version to retrieve the numbers.
One critical fact about licenses: each QuickBooks version requires its own separate license. A license purchased for QuickBooks Desktop 2024 activates that version only – it does not activate a fresh 2025 installation. If the reinstall involves upgrading from 2024 to 2025, a 2025 license is required. If the reinstall is for the same version, the same license number applies. Confirming the license matches the version before starting eliminates the most common post-reinstall activation failure.
Item 2: A Full Company File Backup
Creating a full backup of the company file before the clean reinstall is mandatory. The backup is stored as a .QBB file – QuickBooks Backup – which is a complete, compressed copy of the company file that can be restored in any QuickBooks installation. Go to File > Back Up Company > Create Local Backup. On the Options screen, select Complete Verification – this confirms the backup file is valid before saving it. Save the backup to an external drive, a USB drive, or a cloud storage location that is not on the same computer receiving the reinstall.
The backup protects against data loss from any unexpected event during the reinstall process. While the clean reinstall itself does not delete company files, an unexpected power failure during the reinstall, a hard drive error, or any other system event during the process could affect data. A backup created immediately before the reinstall is the restore point that guarantees the business can return to full operation even if something unexpected happens during the process.
Item 3: The Company File Location
Note the exact folder path where the company file is stored before starting the reinstall. The company file path is displayed at the top of the QuickBooks window when the file is open. The full path includes the drive letter and all folder names, for example: C:\Users\Business\Documents\QuickBooks 2025\CompanyName.qbw. After the reinstall, QuickBooks opens to the No Company Open window and needs to be directed to the company file manually. Knowing the exact path eliminates searching for the file after the reinstall completes.
Item 4: A Fresh QuickBooks Installer
Download a fresh installer from Intuit’s official Downloads & Updates page immediately before starting the clean reinstall. A fresh download from Intuit’s official page guarantees the installer is complete, unmodified, and contains the latest maintenance release. To download: go to Intuit’s Downloads & Updates page, select the country, the QuickBooks Desktop product (Pro Plus, Premier Plus, or Enterprise), and the version year, then click Search and select Get the latest updates. Save the installer file directly to the Desktop. A file saved inside nested folders risks producing installation errors from long file path names.
The QuickBooks Desktop Clean Reinstall Process: Step by Step
Phase 1: Uninstall QuickBooks Through the Windows Control Panel
All other programs should be closed before starting the uninstall. Any program that has a QuickBooks file open – including the QuickBooks File Copy Service, a background Windows service that QuickBooks uses for backup operations – will prevent the uninstaller from removing those files. Press Ctrl + Shift + Esc to open Task Manager and end any running QuickBooks processes (QBW32.exe, QBDBMgrN.exe, QBCFMonitorService.exe) before proceeding.
Press Windows + R, type control panel, and press Enter. Go to Programs and Features (or Uninstall a Program). Find QuickBooks Desktop in the list. Right-click it and select Uninstall/Change. Select Remove and click Next. If an option to sign out of Windows and sign back in with administrative rights appears, follow that instruction before proceeding. Complete the uninstall wizard. Restart the computer after the uninstall finishes.
Phase 2: Run the QuickBooks Clean Install Tool
The QuickBooks Clean Install Tool is the step that makes a clean reinstall different from a standard reinstall. This tool finds and removes the QuickBooks installation folders that the standard Windows uninstall leaves behind, renames them by adding .OLD to the end of each folder name, and confirms that no leftover QuickBooks data exists to interfere with the new installation. According to Intuit, this tool systematically renames corrupted installation folders, allowing Windows to create entirely fresh directories from scratch during reinstallation. It is particularly effective for fixing stubborn errors like Error 1402, frequent company file crashes, and multi-user connectivity failures.
Download the QuickBooks Clean Install Tool from Intuit’s official support page (search for “QuickBooks Clean Install Tool” on the Intuit support site). Open the downloaded QuickBooks_clean_install_tool.exe file. Accept the license agreement. Select the QuickBooks Desktop version being reinstalled from the list. Click Continue. When the message box appears saying QuickBooks is ready to complete a clean install and can be installed to the default index, click OK. The tool automatically renames all QuickBooks installation folders by adding .OLD to their names. When the tool reports it is done, proceed to Phase 3 without restarting yet.
Phase 3: Manually Rename Remaining QuickBooks Folders
The Clean Install Tool renames most QuickBooks folders automatically, but some user-specific folders stored in hidden locations require manual renaming. These folders contain user preferences and settings that, if left unrenamed, can cause the new installation to inherit some of the same configuration problems that prompted the reinstall. Making hidden folders visible in File Explorer is required before these can be found and renamed.
Open File Explorer. Click View > Show > Hidden Items to make hidden folders visible. Navigate to each of the following locations and rename the QuickBooks folder by right-clicking, selecting Rename, and adding OLD to the end of the name:
- C:\Program Files\Intuit\QuickBooks [Year] → QuickBooks [Year]OLD
- C:\Program Files (x86)\Intuit\QuickBooks [Year] → QuickBooks [Year]OLD (if this folder exists)
- C:\ProgramData\Intuit\QuickBooks [Year] → QuickBooks [Year]OLD
- C:\Users[Your Username]\AppData\Local\Intuit\QuickBooks [Year] → QuickBooks [Year]OLD
If any folder cannot be renamed because a QuickBooks process is still using it, open Task Manager (Ctrl + Shift + Esc), go to the Processes tab, find any QuickBooks-related process, right-click it, and select End Task. Then try renaming the folder again. Restart the computer after all folders have been renamed.
Phase 4: Install QuickBooks Fresh in Selective Startup Mode
Installing QuickBooks in Selective Startup mode disables antivirus software and all third-party background programs for the duration of the installation. Antivirus programs that run during installation can intercept the installer’s file write operations and produce the same errors that prompted the clean reinstall. Selective Startup mode prevents this by allowing only essential Microsoft services to run during the installation process.
Press Windows + R, type msconfig, press Enter. Click the General tab. Select Selective Startup. Uncheck Load Startup Items. Click the Services tab. Check Hide All Microsoft Services. Click Disable All. Click Apply > OK. Restart the computer. After restarting, right-click the QuickBooks installer file saved to the Desktop and select Run as administrator. Follow the on-screen steps.
Phase 5: Select the Correct Installation Type
The QuickBooks installer offers two installation type options: Express and Custom and Network Options. Express install saves all preferences and installs QuickBooks into the default location. Express is the correct choice for a single-computer setup where QuickBooks is used only on that machine. Custom and Network Options installs QuickBooks in a different location, keeps prior versions, and sets up network sharing. Custom is required for multi-user setups where the company file is shared over a network. Selecting the wrong option for a multi-user setup produces hosting and connection errors after the reinstall.
On the installation type screen: select Express for single-computer setups. Select Custom and Network Options for multi-user setups. Click Next. For Custom and Network Options, select I’ll be using QuickBooks Desktop on this computer AND I’ll be storing our company file here so it can be shared over our network on the server computer, or select I will NOT be storing our company file on this computer on workstations that only access the file from a server.
Phase 6: Enter the License and Product Numbers, Then Activate
Enter the license number and product number when the installer asks for them. Both numbers are required to activate QuickBooks. After entering them and clicking Next, the installer completes the file installation and launches QuickBooks. QuickBooks will attempt to verify the license with Intuit’s servers during the first launch – an active internet connection is required for this verification. After activation, QuickBooks opens to the No Company Open window.
Phase 7: Return Windows to Normal Startup
After QuickBooks installs and opens successfully, restore Windows to its normal startup mode. Press Windows + R, type msconfig, press Enter. Click the General tab. Select Normal Startup. Click Apply > OK. Click Restart. After the computer restarts in Normal Startup mode, open QuickBooks and confirm it opens normally before re-enabling antivirus protection. Then re-enable antivirus through Windows Security > Virus & Threat Protection > Manage Settings > Real-Time Protection > On.

Phase 8: Re-Open the Company File After the Clean Reinstall
How to Find and Open the Company File?
After a clean reinstall, QuickBooks opens to the No Company Open window because the QBWUSER.INI settings file – which stored the path to the previously opened company file – was removed during the clean install process. The company file itself is completely intact at its original location. Click Open or Restore an Existing Company from the No Company Open window. Select Open a Company File and click Next. Navigate to the folder noted before the reinstall started. Select the .QBW company file and click Open.
For a reinstall where QuickBooks was also upgraded to a newer version, opening the company file in the new version will trigger an automatic file format upgrade. This upgrade converts the company file from the old format to the new version’s format. This conversion is one-way – after a file is upgraded to a newer QuickBooks version format, it cannot be opened in an older version. The backup created before the reinstall preserves the file in the original format and can be opened in the older version if needed.
Run Verify Data After Opening the Company File
After the company file opens in the fresh QuickBooks installation, run Verify Data to confirm the file is in good health. Go to File > Utilities > Verify Data. A clean result (“QuickBooks detected no problems with your data”) confirms the reinstall succeeded and the company file is intact. If Verify Data reports any integrity issues, run Rebuild Data (File > Utilities > Rebuild Data) to repair them. Run Verify Data again after Rebuild to confirm the repair succeeded.
What Happens to Each File Type During a Clean Reinstall in QuickBooks Desktop?
| File or Data Type | Is It Deleted During Clean Reinstall? | Where It Is After Reinstall |
| Company file (.QBW – holds all accounting records) | No – never deleted | Stays at its original location; open it from the No Company Open window |
| Backup files (.QBB – compressed backup copies) | No – never deleted | Stays at the backup location chosen when the backup was created |
| Transaction log file (.TLG) | No – stays with the company file | Same folder as the .QBW file; used automatically when the company file opens |
| Network data file (.ND) | No – stays with the company file | Same folder as the .QBW file; QuickBooks regenerates it if missing |
| QuickBooks program files | Yes – removed and replaced by fresh installation | Reinstalled to C:\Program Files\Intuit\QuickBooks [Year] |
| Installation folders (renamed to .OLD) | Renamed, not deleted | Remain at original paths with .OLD suffix; can be deleted after confirming new install works |
| Registry entries for QuickBooks | Yes – old entries removed, new entries written | Rewritten during the new installation process |
| QBWUSER.INI settings file | Yes – removed as part of installation folder renaming | Recreated automatically when QuickBooks opens for the first time |
| Custom invoice templates | No – stored inside the company file | Available automatically when the company file opens in the new installation |
| Payroll data (CPS folder) | The old CPS folder is renamed to .OLD | A new CPS folder is created; run a Complete Payroll Update after reinstall |
Complete these checks after the company file opens and Verify Data confirms the file is clean:
| After the Clean Reinstall: Post-Installation Checklist | ||
| Check | How to Do It | What to Do If It Fails |
| QuickBooks version and release number match expectations | Press F2 or Ctrl + 1 to open Product Information window | Help > Update QuickBooks Desktop > Get Updates to install latest release |
| Payroll subscription recognized (if applicable) | Employees > My Payroll Service > Account/Billing Information | Employees > Get Payroll Updates > Download Entire Payroll Update (single-user mode) |
| Bank feeds reconnect correctly | Banking > Bank Feeds > Set Up Bank Feed; re-authenticate each bank | Re-enter bank login credentials; bank connections reset after reinstall |
| Reports produce correct totals for known periods | Run Balance Sheet and Profit and Loss for a confirmed period | If totals differ, run Verify Data immediately |
| Multi-user access works for all workstations | Have each workstation attempt to open the company file | Run Database Server Manager scan on host: Tool Hub > Network Issues |
| Antivirus exclusions are in place | Open antivirus settings > Exclusions; confirm QuickBooks folders are listed | Add C:\Program Files\Intuit and C:\ProgramData\Intuit to antivirus exclusions |
| QuickBooks closes correctly through File > Exit | Close QuickBooks using File > Exit; confirm no error messages appear | If error appears, run Quick Fix My Program from Tool Hub > Program Problems |
Conclusion
A clean reinstall of QuickBooks Desktop removes all program files, installation folders, and registry entries and replaces them with a fresh, working copy. The company file – the .QBW file holding all accounting data – is never touched by this process. The clean reinstall process has four phases: uninstall QuickBooks through the Control Panel, run the QuickBooks Clean Install Tool to remove leftover files, rename remaining hidden installation folders manually, and install a fresh copy in Selective Startup mode using a newly downloaded installer from Intuit’s official Downloads & Updates page.
The QuickBooks Clean Install Tool makes this process reliable by targeting the installation folders and registry entries that a standard Windows uninstall misses. These leftover items are the reason a simple reinstall often fails to solve persistent problems – the new installation inherits the same damaged data and produces the same errors. The Clean Install Tool eliminates this by renaming every QuickBooks folder before the new installation begins, forcing the installer to create fresh, undamaged versions of each folder from scratch.
Gathering the license number, creating a company file backup, noting the company file path, and downloading a fresh installer before starting the process ensures the reinstall can be completed without interruptions. After the fresh installation activates, the company file opens from the No Company Open window, Verify Data confirms the data is intact, and the business resumes full operation. The .OLD folders left by the Clean Install Tool can be deleted after one week of confirming the new installation works correctly.
Frequently Asked Questions
1. QuickBooks was reinstalled successfully but payroll shows it needs to be set up again. Does the clean reinstall delete payroll data?
The clean reinstall renames the CPS folder – Common Payroll Setup – to CPS.OLD by adding .OLD to its name. This folder, stored at C:\ProgramData\Intuit\QuickBooks, contains the payroll configuration files and downloaded tax table data. Renaming it to .OLD means the new QuickBooks installation creates a fresh CPS folder that does not yet have the payroll tax tables downloaded.
The payroll subscription itself is not deleted – it remains active in the Intuit account. Go to Employees > Get Payroll Updates > Download Entire Payroll Update to download the complete payroll tax package into the new CPS folder. Run this update in single-user mode (File > Switch to Single-User Mode) to prevent any multi-user interference during the download.
2. The company file opens after the reinstall but some custom invoice templates are missing. Where did they go?
Custom invoice templates created inside QuickBooks are stored within the company file itself – they are not stored in the QuickBooks program folders that were removed during the clean reinstall. Opening the company file in the fresh installation makes all templates automatically available because they travel with the company file.
If templates appear missing after the reinstall and the same company file was opened, go to Lists > Templates inside QuickBooks to view the full template list. Some templates may need to be made visible again if they were hidden rather than deleted.
Templates that were imported from external .QBT or .DES files – which are external template file formats – were stored outside the company file and need to be re-imported from wherever those external files were saved.
3. The Clean Install Tool is not showing in the QuickBooks Tool Hub. How is it accessed?
The QuickBooks Clean Install Tool is a separate download from the QuickBooks Tool Hub, not a tool that runs directly from inside the Tool Hub interface. The Tool Hub provides a link to download the Clean Install Tool from the Installation Issues tab. To access it: open the QuickBooks Tool Hub, click Installation Issues in the left menu, and look for a link or button referencing the Clean Install Tool.
Alternatively, search for “QuickBooks Clean Install Tool” directly on Intuit’s official support website to download the QuickBooks_clean_install_tool.exe file. The tool runs independently after downloading and does not require the Tool Hub to be open while it runs.
4. Is it safe to delete the .OLD folders after the clean reinstall, or should they be kept?
The .OLD folders – the renamed copies of the QuickBooks installation folders left behind by the Clean Install Tool – are safe to delete after confirming the new installation works correctly for at least one full week. They serve as a reference in case the reinstall produces an unexpected issue and a comparison with the old installation data is needed.
They do not affect the new QuickBooks installation in any way because they have the .OLD suffix and QuickBooks does not look for folders with that name. To delete them, navigate to the same paths where they were created (C:\Program Files\Intuit, C:\ProgramData\Intuit, and the AppData\Local\Intuit location), right-click each .OLD folder, and select Delete. Empty the Recycle Bin after deletion.
5. Multi-user mode is not working after the clean reinstall on the host computer. Other workstations cannot connect to the company file. What restores multi-user access?
A clean reinstall on the host computer – the computer where the company file is stored – removes the QuickBooks Database Server Manager configuration as part of the reinstall process. The Database Server Manager is the background service on the host computer that manages all connections from workstations to the company file.
After the reinstall, it needs to be rescanned to re-register the company file folder. Open the QuickBooks Tool Hub on the host computer. Click Network Issues in the left menu. Click QuickBooks Database Server Manager. Click Scan Folders. Add the folder containing the company file if it is not already listed. Click Scan.
After the scan finishes, test multi-user access from all workstations. Also confirm that all workstations are running the same QuickBooks version and release number as the freshly reinstalled host – a version mismatch between the host and workstations produces connection errors that mimic multi-user configuration failures.
Anusmita is a seasoned content writer who brings perspective to words. As a writer, she enriches her work with a journalistic aptitude, utilising her training in Mass Communication and Journalism. She loves to travel and explore, which imparts a greater sense of understanding, maturity, and experience that are reflected in her content.
Beyond her professional work, Anusmita enjoys painting, singing, dancing, and spending time planting. She is also a self-proclaimed foodie who loves exploring different cuisines, an interest that further adds to her curiosity and perspective as a writer.
Leave a Reply