The QuickBooks Tool Hub is a compilation of tools by Intuit, offering solutions for diverse issues in QuickBooks Desktop. Each tab within the hub contains specific tools tailored to address various problems users might encounter. By selecting the relevant tab, users can effortlessly run the QuickBooks Tool Hub to resolve specific issues.
To utilize the QuickBooks Tool Hub, start by downloading and installing it on your system. After a complete installation, click the tool hub icon to launch the software. Navigate through various sections/tabs, each equipped with distinct tools tailored to address specific QuickBooks-related issues and errors. Let’s explore how to utilize these tab in the QuickBooks Tool Hub to seamlessly fix a variety of problems.
Step-by-Step Guide to Successfully Run QuickBooks Tool Hub as Per Your Issues:
System Requirements to Run QuickBooks Tool Hub:
After downloading and installing of the Tool Hub, it’s crucial to meet the following system requirements to run QuickBooks Tool Hub seamlessly :
- .NET Framework: Ensure the presence of the .Net Framework on your system before installing the QuickBooks Tool Hub.
- Microsoft Visual C++ Redistributable Package: Examine and confirm the installation of the Microsoft Visual C++ Redistributable Package to prevent any potential errors during Tool Hub execution.
- Processor Speed: Your computer should boast a minimum of a 2.4 GHz processor to guarantee the smooth operation of the QuickBooks Tool Hub.
- RAM Requirements: A minimum of 4 GB RAM is mandatory for the efficient functioning of QuickBooks Tool Hub. However, having more RAM can significantly enhance tool performance, especially when dealing with substantial company files.
- Disk Space: Allocate a minimum of 2.5 GB of available disk space on your system for the installation and optimal functionality of QuickBooks Tool Hub.
- Screen Resolution: The clarity and sharpness of images and text displayed on your monitor depend on screen resolution, measured in pixels horizontally and vertically. Recommended resolutions include 1280×1024 and 1920×1080 for Full HD.
- Internet Connection: Ensure a stable internet connection, serving as the gateway for your devices to connect to the internet and access online resources.
- Adobe Acrobat Reader: Adobe Acrobat Reader, a widely utilized software for viewing, printing, and commenting on PDF documents, should be available on your system.
- Administrator Rights: Administrator rights is crucial, granting the necessary level of control and rights to a user account. Users with administrator privileges can install software, modify system settings, and make significant changes to the system.
How to Run QuickBooks Tool Hub?
| Important Note: It is recommended that you must use Tool Hub on Windows 10 (64-bit) for best experience. |
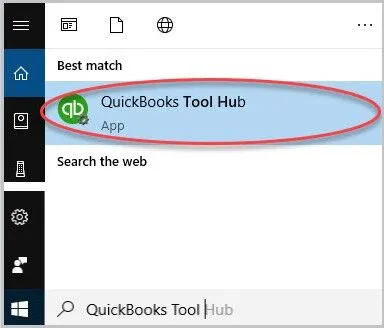
After downloading and installing the QuickBooks tool hub, double-click the QuickBooks® Tool Hub icon on your Windows desktop to open the software.

Note: If the icon is not visible on your desktop, type QuickBooks Tool Hub in your Windows search bar and select the program (refer to the screenshot below).
Main Dashboard Overview: QuickBooks Tool Hub
The QuickBooks Tool Hub’s user-friendly main dashboard serves as a centralised control centre for simplified troubleshooting. It categorizes tools under sections like “Company File Issues” and “Network Issues” for easy navigation. Visual indicators facilitate quick identification, and one-click access streamlines tool usage. Notably, it prominently features commonly used tools like QuickBooks File Doctor, providing status updates, notifications, and links to additional resources. This ensures a straightforward and efficient troubleshooting experience, catering to users of varying technical expertise.
Here is a Brief Overview of Each Section on How to Run QuickBooks Tool Hub:
Home Tab:
The Home Tab acts as the initial point upon launching the QuickBooks Tool Hub. It offers quick links to commonly used tools, ensuring convenient access to essential features. Serving as a centralised hub, this tab facilitates navigation to specific troubleshooting sections. Each tab provides brief information about the tool hub and guides effective usage by choosing specific components to address particular problems in QuickBooks software.
Company File Issues Tab:
The Company File Issues tab, the 2nd tab in QuickBooks Tool Hub, is specifically designed to address problems related to your QuickBooks company file. Here, users can access various tools, including “Quick Fix My File” and QuickBooks File Doctor, aimed at diagnosing and repairing issues related to the company file. These tools ensure seamless data access and integrity, contributing to a smoother QuickBooks experience.
- Resolve various H series errors, including QuickBooks error H202 and QB Error code H505.
- The tool proves invaluable for handling missing or blank vendor, customer, or employee lists.
- if you’re experiencing issues with (6XXX series) Error like -6150, -6000 -82, -6000 -305, -6000 -301, -6147, or -6130.
- Missing or blank customer, vendor, or employee lists.
How to Run Quick Fix My File by Company File Issue Tab?
Intuit has introduced a new feature called “Quick Fix My File” after the last update, it’s likely designed to address specific issues related to the company file. You can run this feature by following the below steps:
- Open Quickbooks tool hub
- From the tool hub, navigate the Company File Issues tab.
- Select Quick Fix my File.
- Select OK when it completes and launch your QuickBooks again.
Run QuickBooks File Doctor Tool Via Company File Issue Tab:
- Navigate to the Company File Issues section in the QuickBooks Tool Hub.
- Select “Run QuickBooks File Doctor,” and patiently wait for the tool to open, which may take up to a minute.
- In case the tool doesn’t open, manually search for “QuickBooks Desktop File Doc” and open it.
- Within QuickBooks File Doctor, choose your company file from the drop-down menu. If not visible, use the Browse option to locate your file.
- Opt for “Check your file” (middle option) and click Continue.
- Enter your QuickBooks admin password and proceed by selecting Next.
- The scanning time depends on your file size, usually taking 10–15 minutes. Even if the scan reports an unsuccessful attempt, your issue may still be resolved.
By following these steps, you can efficiently troubleshoot and fix various company file -related issues in QuickBooks.
Network Issues Tab:
The 3rd tab in QuickBooks Tool Hub, the Network Issues tab, focuses on resolving problems related to network connectivity. Users can access the QuickBooks Database Server Manager option within this tab. For those using QuickBooks in multi-user mode and facing issues with network connectivity or computers over a network (e.g., errors h202, h303, h505), the Network Issues tab provides a solution. It’s crucial to address these concerns from the server computer for effective resolution.
How to Run QuickBooks Database Server Manager in the Network Issues Tab?
QuickBooks Database Server Manager is a useful feature that allows you to effortlessly share your company files in multi-user mode within your network. Setting up a network becomes a breeze with the assistance of QuickBooks Database Server Manager, enabling seamless access to company files for users. Here’s how user can run this feature:
- Launch the QuickBooks Tool Hub
- Navigate to the Network Issues Tab
- Inside the Network Issues tab, you will find the option to select “QuickBooks Database Server Manager
- Click on QuickBooks Database Server Manager to address any network-related problems that may be affecting your system.
Program Problems Tab:
This is the 4th tab in QuickBooks Tool Hub. If you’re facing performance issues, trouble opening the program, facing Error related to 6xxx series, or issues with Microsoft components, select the Program Problems tab.
You can access three different tools by navigating to this tab. Start with Quick Fix my Program, QuickBooks Program Diagnostic Tool or QuickBooks Print & PDF Tool to resolve common PDF and printing related issues.
Let’s delve into each one step by step how to run them:
How to Run Quick Fix My Program via the Program Problems Tab?
First off, we’ve got the ‘Quick Fix My Program.’ It’s like a quick fix button for when the QuickBooks has stuck due to program issues. It swiftly shuts down background processes and explores potential solutions to ongoing problems.
- In the QuickBooks Tool Hub, select Program Problems tab
- Select Quick Fix my Program.
- Start QuickBooks Desktop and open your data file.
How to Run QuickBooks Program Diagnostic Tool via the Program Problems Tab?
You can run ‘”QuickBooks Program Diagnostic tool’ when your QuickBooks desktop starts showing unexpectedly you can run this tool. It repairs major Microsoft components helpful in running QuickBooks seamlessly.
- Open the QuickBooks Tool Hub, then select the Program Problems tab.
- Click on QuickBooks Program Diagnostic Tool. Let the tool run. It can take up to 15 minutes.
- When the tool finishes, restart your computer and start QuickBooks Desktop, then open your data file.
How to Run QuickBooks Print & PDF Repair Tool via the Program Problems Tab?
Last but not least, we have the ‘QuickBooks Print & PDF Repair Tool,’ developed specifically to fix printing and PDF-related issues within the QuickBooks application. If you find yourself struggling with errors while emailing or printing PDFs, this tool is your troubleshooter.
- Launch the QuickBooks Tool Hub,
- Navigate the Program Problems tab.
- Click on Print & PDF Repair Tool. Let the tool run. It can take up to 10 minutes.
- When the tool finishes, restart your computer and start QuickBooks Desktop.
Installation Issues Tab:
This is the 5th tab in QB tool Hub. If you’re having trouble installing, uninstalling, or reinstalling QuickBooks software or encountering errors during the installation process, head to the Installation Issues tab. Here, tools like QuickBooks Install Diagnostic Tool and Clean Install Tool assist in resolving installation-related problems or the user can select the 3371 Error Fix option to fix QuickBooks 3371 error.
How to Run QuickBooks Install Diagnostic Tool via Installation Issues Tab?
- Open the QuickBooks Tool Hub.
- In the tool hub, navigate Installation Issues tab.
- Select QuickBooks Install Diagnostic Tool. Let the tool run. It can take up to 20 minutes.
- When the tool finishes, restart your computer.
How to Run QuickBooks Clean Install Tool via Installation Issues Tab?
The Clean Install tool is designed to make uninstalling the program a breeze and resolving any related issues. With this tool, you can perform a complete uninstallation, ensuring a smoother experience and resolving any issues that users may face.
- Open the QuickBooks Tool Hub.
- In the tool hub, navigate Installation Issues tab.
- Select QuickBooks Clean Install Tool.
- When the tool finishes, restart your computer.
Password Reset Tab:
For users who need to reset their QuickBooks Administrator password, the Password Reset tab provides a convenient solution. This tab guides you through the process of resetting your password securely, ensuring that you regain access to your QuickBooks account without any hassle.
The Password reset tab in QuickBooks tool hub is helpful in resetting the password of QuickBooks desktop US version, UK and CA versions.
How to Run Password Reset Feature via Password Reset Tab in QuickBooks Tool Hub?
- Open QuickBooks Tool Hub
- select the “password reset”
- Reset Admin Password on this page by choosing “CA reset password” or “UK reset password”. options
Help & Support Tab:
This is the 7th tab in QuickBooks tool hub. The Help & Support tab serves as a valuable resource for accessing additional assistance and resources. Whether you need to contact QuickBooks Enterprise, Premier or Pro Support team.
By navigating the Help & Support tab users can also access community forums, check for software related updates or essential links to enhance your overall QuickBooks experience.
Advanced Tools Tab:
The Advanced Tools tab is the new feature in the latest tool hub version (1.6.0.3)..
Advanced Tools in the tool hub includes 14 buttons like “about this PC”, “change startup apps”, “check for windows updates”, “Launch windows explorer”, “resolve performance issues”, etc to enhance the efficiency of resolving QuickBooks problems and issues. This tab is meant for advanced users or Qualified IT professionals only. They can help you resolve many errors by choosing these options.
Note: If the tool from the Tool Hub isn't installed, it will automatically download in the background, taking 2-3 minutes to complete. Please be patient, as closing the installation prematurely may prevent the tool from running.
By navigating, understanding and utilizing the various tabs and sections within the QuickBooks Tool Hub, users can efficiently diagnose and resolve a wide range of common issues and errors, ensuring a seamless experience with QuickBooks Desktop. Regularly using these tools as part of your troubleshooting routine can help maintain the stability and reliability of your QuickBooks software.
Importance of Running QuickBooks Tool Hub for Troubleshooting Common Issues:
Centralized Solution:
- The Tool Hub works as a one-stop solution for users, providing easy access to multiple tools specifically crafted to resolve different types of issues and errors. This centralized approach simplifies the troubleshooting process and eliminates the need for users to navigate through various interfaces.
Diverse Problem Resolution:
- The QuickBooks Tool Hub is super useful because it can help with many different problems you might face while using QuickBooks. Whether you’re having trouble installing the software, connecting to the internet, dealing with issues in your company files, or just facing some common errors, the Tool Hub has the collection of various tools like QuickBooks File Doctor, QuickBooks Program Diagnostic Tool, , Print & PDF Repair Tool, QuickBooks Install Diagnostic tool and clean install tool that can easily fix each type of problem. It’s like having a handy solution for all your QuickBooks issues in one place!
User-Friendly Interface:
- The Tool Hub is designed with the users in mind, featuring an intuitive interface that doesn’t require any advanced technical expertise. Its simplicity ensures that users, regardless of their proficiency with technology, can easily navigate through the tools, run and troubleshoot without feeling overwhelmed. It’s all about making the process straightforward and accessible for everyone.
Official Support Channel:
- Recognized as an official tool provided by Intuit, the QuickBooks Tool Hub instills confidence in users, assuring them of reliability and compatibility. Users can trust that they are employing a solution endorsed by the developers of QuickBooks, enhancing the credibility of the troubleshooting process.
FAQs:
How do I update QuickBooks Tool Hub?
To update your QuickBooks Tool Hub, follow these simple steps:
- Close QuickBooks: Before updating, ensure QuickBooks is closed to allow the tool hub to function properly.
- Download the Latest Version: Visit the official QuickBooks website and download the most recent version of the QuickBooks Tool Hub. Save the file in a location that is easy to find, such as your Downloads folder or Windows desktop.
- Check Existing Version (if applicable): If you’ve used the Tool Hub before, you can identify the version by selecting the Home tab. The version information is located at the bottom.
- Open the Downloaded File: Launch the downloaded file, QuickBooksToolHub.exe, and follow the on-screen instructions for installation. Be sure to agree to the terms and conditions.
- Completion of Installation: Once the installation is complete, double-click the icon on your Windows desktop to open the updated QuickBooks Tool Hub.
Note: In case you can’t locate the QuickBooks Tool Hub icon on your desktop, perform a search in Windows for “QuickBooks Tool Hub” and select the program from the results.