A Windows security update can silently reset your firewall rules, change your network profile, and alter service permissions — all in one installation. QuickBooks Desktop depends on three things to let multiple computers share a company file: a set of open firewall ports, two background services running continuously on the host computer, and a network configuration that allows file sharing. A security update that changes any one of those three things cuts off every workstation from the company file, even when the file itself is completely intact.
The errors that follow a Windows security update are predictable, not random. Error H202 appears when workstations lose their connection to the host computer. Error H505 appears when a workstation incorrectly becomes the host. QBCFMonitorService errors appear when the connection monitoring service stops running. Firewall port errors appear when the update clears the custom port rules QuickBooks needs to communicate on the network. Each of these has a direct cause and a direct fix.
This article covers every major network connectivity problem that appears in QuickBooks Desktop after a Windows security update. Each section explains what the problem is, what the update changed to cause it, what damage it causes if left alone, and the exact steps that restore normal operation. All fixes in this article follow Intuit’s documented guidance.
Table of Contents
Identify Your Network Problem in 60 Seconds
Match your symptom to the correct section before reading further:
| What You See on Screen | What the Update Changed | Go to Section |
| Error H202 on all workstations after update | Firewall rules or network profile reset | Section 2: H202 and H505 |
| Error H505 on specific workstations | Hosting activated on wrong computer | Section 2: H202 and H505 |
| QBCFMonitorService not running on this computer | Service startup setting or permissions changed | Section 3: QBCFMonitorService |
| Company file opens on host, not on workstations | Firewall port rules cleared by update | Section 4: Firewall Ports |
| H202 with packet loss when pinging host | DNS or hostname resolution broken by update | Section 5: DNS Issues |
| QuickBooks Database Server Manager not scanning | Service disabled or folder permissions changed | Section 6: Database Server Manager |
Tip: If you see a specific error code, match the code first. The section number tells you exactly where to go.
1. Why Windows Security Updates Break QuickBooks Network Access
What a Windows Security Update Changes on Your Computer?
A Windows security update is a software package Microsoft distributes to fix security vulnerabilities — gaps in Windows that an attacker could exploit to access your files or network. These updates patch the firewall engine, network stack, and service permission system. QuickBooks Desktop uses all three of those components to share company files across multiple computers, which is why a security patch that tightens those components disrupts QuickBooks multi-user access.
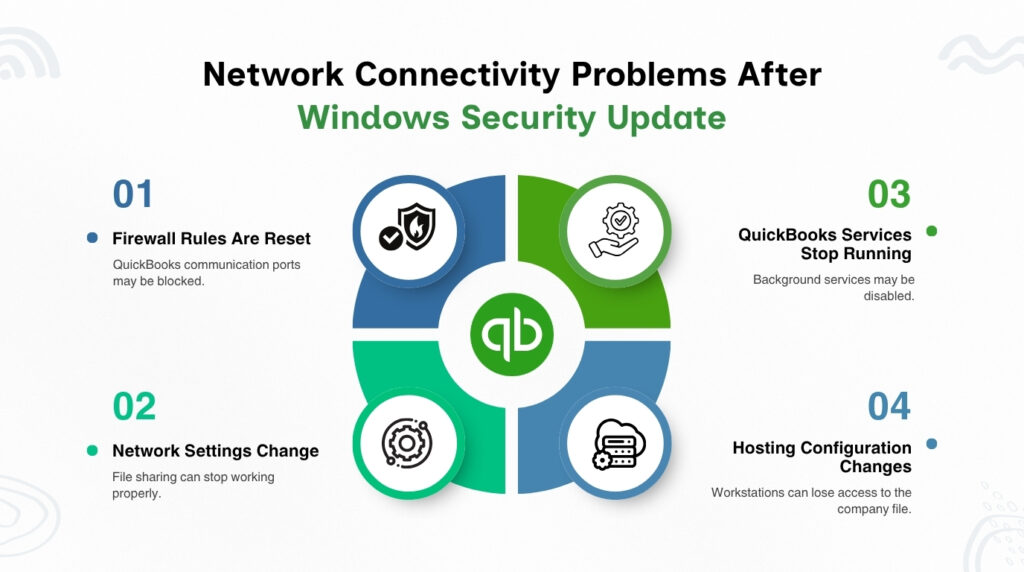
The most common update-related change is a firewall rule reset. A security patch that modifies the Windows Firewall engine can remove the custom port exceptions QuickBooks created during installation. When those port exceptions disappear, the firewall blocks the exact network traffic QuickBooks uses to connect workstations to the host computer. Every workstation starts showing H202 or H505 errors the next time anyone tries to open the company file, even though nothing inside the file changed.
A second common change is a network profile reset. Windows assigns every network connection a profile: Private or Public. A Private profile allows file and printer sharing between computers on the network. A Public profile blocks all sharing for security. A Windows security update can silently change the network profile from Private to Public, and QuickBooks multi-user access stops immediately because file sharing is turned off on a Public network.
The Two Services QuickBooks Cannot Work Without?
QuickBooks Desktop multi-user mode runs two background services on the host computer: QuickBooksDBXX and QBCFMonitorService. QuickBooksDBXX — where XX is a version number linked to your QuickBooks year — is the Database Server Manager service that manages which workstations can access the company file and handles all data traffic between the host and the network. QBCFMonitorService is the connection monitoring service that watches over live connections and alerts QuickBooks when a connection drops.
Both services must be running simultaneously on the host computer at all times for workstations to open the company file. A Windows update that restarts services during installation, changes service account permissions, or resets startup settings can stop one or both services. When the services stop, no workstation can connect to the company file — and because the error message names a service rather than a file, users often assume the company file is damaged when it is not.
Intuit confirms that H202, H303, H505, H101, and QBCFMonitorService failures all share one root cause: something is blocking the multi-user connection to the server. A Windows security update is one of the most reliable triggers for that blockage because it changes firewall rules, network profiles, and service startup settings in a single pass.
2. Error H202 and H505: Workstations Cannot Reach the Host Computer
What These Errors Mean?
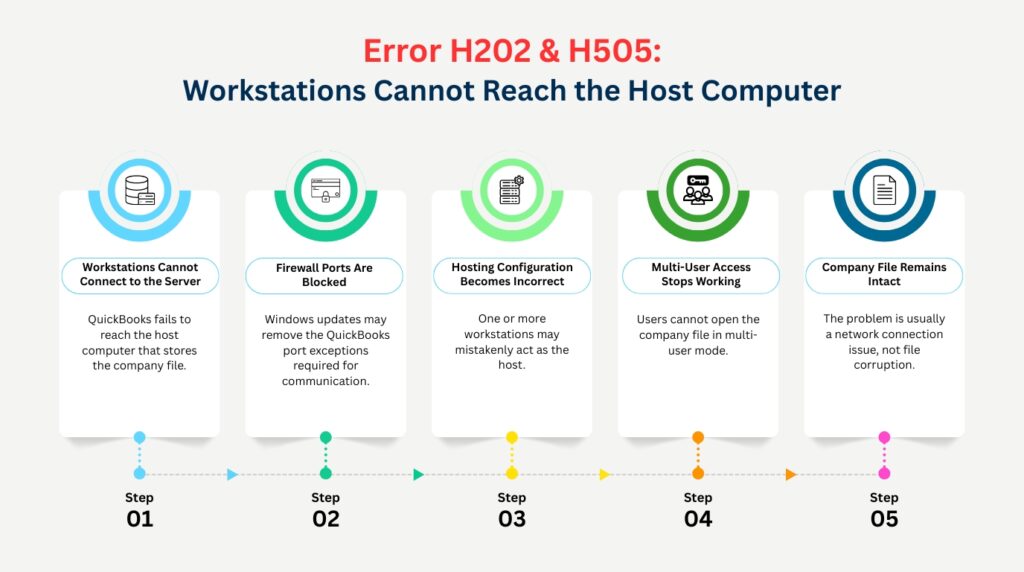
Error H202 displays the message: This company file is on another computer, and QuickBooks needs some help connecting. Error H505 appears when one or more workstations are incorrectly set to act as the host. Both errors mean the workstation tried to reach the host computer to open the company file and the connection was refused. These errors only appear in multi-user mode — a single user on a standalone computer never sees them.
The connection QuickBooks needs is not the same as a general network connection. QuickBooks uses its own services and its own numbered network ports to transfer company file data. A Windows security update that blocks those ports stops QuickBooks from connecting even when the general network is working — you can still browse shared folders and print to shared printers, but QuickBooks fails because its specific communication channels are closed.
Root Causes After a Windows Security Update?
- Firewall port rules cleared: QuickBooks 2024 needs TCP ports 8019 and 56728 through 56730. QuickBooks 2023 needs 8019 and 56725 through 56727. QuickBooks 2022 needs 8019 and 56722 through 56724. A security update that resets Windows Firewall to its default state removes all of these exceptions, and QuickBooks traffic gets blocked on every one of those ports.
- QuickBooksDBXX service stopped: The Database Server Manager service on the host computer stops when a Windows update changes its startup type from Automatic to Manual or revokes the service account’s permissions. The service stays stopped after the next reboot, and workstations get H202 because the service that manages company file access is no longer running.
- Network profile reset to Public: Windows file sharing — which QuickBooks multi-user mode uses to transfer company file data — is disabled on a Public network profile. A security update that changes the network profile from Private to Public shuts off file sharing immediately, and H202 errors follow on every workstation connected to that network.
- Incorrect hosting on a workstation: H505 appears when a workstation is set to host the company file. Only the computer that physically stores the file should have Host Multi-User Access turned on. An update that resets QuickBooks settings can activate hosting on workstations that should not have it, creating a conflict that blocks every other workstation.
How to Fix H202 and H505 After a Windows Update?
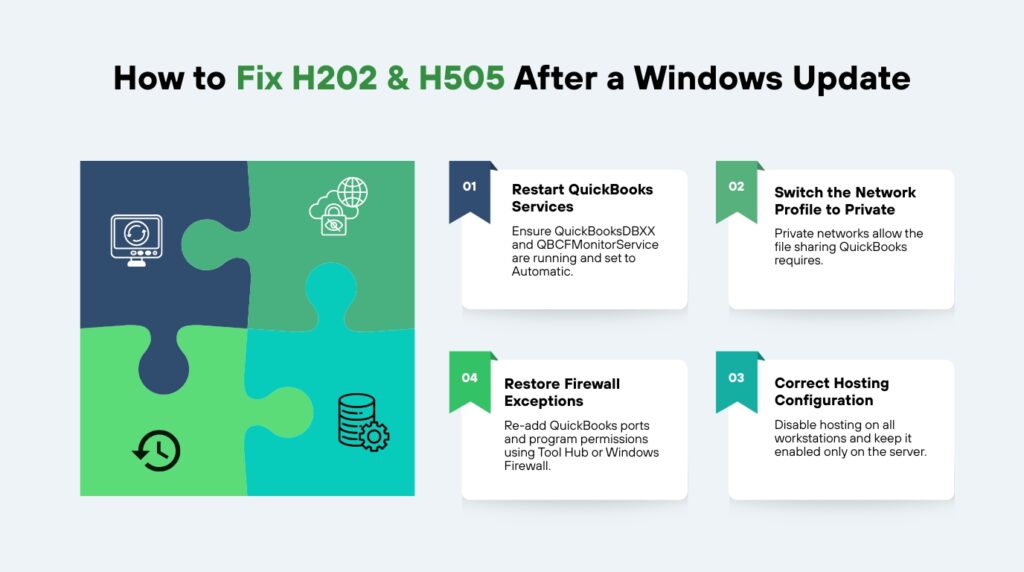
Step 1 — Confirm both QuickBooks services are running on the host computer. Open the Windows Start menu, type services.msc, and press Enter. Find QuickBooksDBXX in the list — the XX is your QuickBooks version year plus 10, so QuickBooks 2023 becomes QuickBooksDB33. Double-click it, set Startup type to Automatic, and confirm the status is Running. Click the Recovery tab and set all three failure dropdowns to Restart the Service. Repeat this for QBCFMonitorService.
Step 2 — Check the network profile on the host computer. Open Settings, go to Network and Internet, click on the active connection, and confirm the Network Profile reads Private. A Public setting disables file sharing and blocks QuickBooks multi-user access. Change it to Private, close Settings, and try opening the company file from a workstation again.
Step 3 — Restore the QuickBooks firewall rules. Download QuickBooks Tool Hub from Intuit’s official website, install it, open it, go to Network Issues, and run QuickBooks File Doctor. The tool scans the Windows Firewall and automatically re-adds the port and program exceptions that QuickBooks requires. To add them manually instead, open Windows Defender Firewall, go to Advanced Settings, and create inbound and outbound TCP rules for ports 8019 and the three dynamic ports for your QuickBooks version.
Step 4 — Fix incorrect hosting on workstations showing H505. Open QuickBooks on the affected workstation without opening the company file. Click the File menu, hover over Utilities, and check whether the option reads Host Multi-User Access or Stop Hosting Multi-User Access. If it reads Stop Hosting Multi-User Access, click it to turn hosting off on that workstation. Only the host computer that stores the company file should have hosting active.
QuickBooks Error H202 / H505 Diagnosis and Fix Summary
| Symptom | Cause After Windows Update | Fix |
| H202 on all workstations at once | Firewall port rules cleared by update | Run File Doctor from Tool Hub to restore port rules |
| H505 on specific workstations | Hosting incorrectly activated on that workstation | Turn off Host Multi-User Access on the workstation |
| H202 and no file sharing on network | Network profile changed to Public by update | Change network profile to Private in Settings |
| H202 after host computer reboot | QuickBooksDBXX startup type changed to Manual | Set QuickBooksDBXX to Automatic in services.msc |
3. QBCFMonitorService Not Running: The Connection Monitor Goes Quiet
What QBCFMonitorService Does and Why Its Failure Matters?
QBCFMonitorService is the background service that QuickBooks runs on the host computer to monitor active connections between the host and every connected workstation. The service watches the company file’s network availability in real time. When it is running, workstations stay connected to the company file without interruption. When it stops, every workstation receives an error stating that QBCFMonitorService is not running on this computer — and every connection to the company file fails.
This service runs independently from QuickBooksDBXX. Both must be active simultaneously for multi-user access to work. A Windows security update stops QBCFMonitorService in two common ways: the update changes the startup permissions for the account the service runs under, blocking it from launching at boot, or the update stops the service during installation and does not restart it because the startup type was set to Manual instead of Automatic.
The DNS Startup Timing Problem?
A specific cause of QBCFMonitorService failures — documented in the QuickBooks Community — occurs on server computers where the Windows DNS service loads slowly after a security update. QBCFMonitorService starts during the Windows boot sequence and needs to resolve the host computer’s own network address. On a computer where DNS loads slowly, QBCFMonitorService starts before DNS is ready, fails its address lookup, and stops itself. The service appears stopped even though no permission error occurred.
The fix for this timing issue is to change QBCFMonitorService’s startup type from Automatic to Automatic (Delayed Start) in services.msc. The Delayed Start option instructs Windows to wait until all core services — including DNS — have fully loaded before starting QBCFMonitorService. This single change permanently prevents the timing failure on server environments where the problem recurs after every reboot.
How to Restore QBCFMonitorService?
Open services.msc from the Windows Start menu. Find QBCFMonitorService in the list and double-click it. Set the Startup type to Automatic, or Automatic (Delayed Start) if DNS timing is the cause. Click Start if the service status shows Stopped. Go to the Recovery tab and set all three failure dropdowns — First failure, Second failure, Subsequent failures — to Restart the Service. Click Apply and OK. Restart the host computer and confirm the service is running before opening QuickBooks on any workstation.
If the service starts but stops again within seconds, the Windows Firewall is blocking the service’s executable file. The executable is named QBCFMonitorService.exe and is stored in the C:\Program Files\Common Files\Intuit\QuickBooks folder. Add a program-level exception for this file in Windows Defender Firewall — create both an inbound and an outbound rule that allows the file to communicate freely. Save the rules, start the service again, and confirm it stays running.
4. Firewall Port Blocking: QuickBooks Network Traffic Gets Stopped
How QuickBooks Uses Firewall Ports?
A firewall port is a numbered communication channel through which specific types of network traffic travel. Windows Firewall controls which ports are open and which are blocked. QuickBooks Desktop uses port 8019 as its base communication port across all versions. Each version also uses a range of additional ports for the data transfer that happens when workstations access the company file. Intuit also requires ports 80 and 443 to be open for QuickBooks to reach its online services — payroll updates, subscription checks, and bank feeds all use those two standard web ports.
A Windows security update that patches the Windows Firewall engine can reset the firewall to its default state as part of the patching process. When the firewall resets, every custom rule that QuickBooks created during installation disappears. The ports close, and QuickBooks services on the host computer can no longer send or receive data on those channels. Every workstation that tries to open the company file gets blocked before the connection starts — and the error code depends on which specific component the blocked port was serving.
How to Reconfigure Firewall Ports for QuickBooks?
The fastest method is to run QuickBooks File Doctor from the QuickBooks Tool Hub. Download Tool Hub from Intuit’s official website, install it, open the Network Issues tab, and select Run QuickBooks File Doctor. The tool inspects the current firewall configuration and automatically adds the port and program exceptions your QuickBooks version requires. Intuit recommends running this tool before attempting any manual configuration.
To configure ports manually, open Control Panel, click Windows Defender Firewall, and select Advanced Settings. Right-click Inbound Rules and select New Rule. Select Port, click Next, select TCP, and enter the port numbers for your QuickBooks version. For QuickBooks 2024, enter: 8019, 56728, 56729, 56730. Select Allow the Connection, apply the rule to Domain, Private, and Public profiles, name the rule QBFirewallException_Inbound, and save. Repeat the same steps under Outbound Rules to create a matching outbound exception.
Beyond the port rules, add program-level exceptions for the three QuickBooks executable files that communicate over the network: QBW32.exe (the main QuickBooks application), QBDBMgrN.exe (the Database Manager), and QBCFMonitorService.exe (the connection monitor). All three files are in the QuickBooks installation folder. Adding them as program exceptions ensures QuickBooks traffic passes through the firewall on any port those programs use, which protects against future port assignment changes.
QuickBooks Firewall Port Reference by Version
| QuickBooks Version | Required TCP Ports | What They Are Used For |
| QuickBooks 2024 | 8019, 56728, 56729, 56730 | Multi-user company file access |
| QuickBooks 2023 | 8019, 56725, 56726, 56727 | Multi-user company file access |
| QuickBooks 2022 | 8019, 56722, 56723, 56724 | Multi-user company file access |
| All versions | 80, 443 | Payroll updates and Intuit online services |
| All versions (fallback) | 56719 | Used if all dynamic ports are already occupied |
5. DNS and Hostname Resolution Failures: Workstations Cannot Find the Host
What DNS Resolution Is and Why QuickBooks Needs It?
DNS stands for Domain Name System. On an office network, DNS resolution is the process a workstation uses to translate the host computer’s name — for example, ACCOUNTING-SERVER — into its IP address, the numerical address the workstation actually uses to send network traffic. QuickBooks workstations read the .ND file stored next to the company file, take the hostname recorded in that file, resolve it to an IP address through the local network’s DNS, and connect to the host at that address.
A Windows security update that changes the host computer’s IP address, resets the network adapter’s configuration, or clears the local DNS cache can break this resolution process. The workstation tries to reach the host at an address that is no longer current. The connection fails, H202 errors appear on the workstation, and the cause is not the firewall — it is DNS. This explains why H202 errors can persist even after the firewall ports have been correctly restored.
How to Diagnose and Fix DNS Issues?
Test hostname resolution from the workstation first. Open the Command Prompt by typing cmd in the Windows Start menu. Type ping HOSTNAME — replacing HOSTNAME with the exact name of the host computer — and press Enter. A clean ping returns four replies with 0% packet loss. Packet loss or a request timeout means the workstation cannot resolve the host computer’s name, and DNS is the root cause. If the ping by name fails but a direct ping by IP address succeeds, the connection is fine but the name lookup is broken.
Fix the name resolution by editing the Windows hosts file on the workstation. Open Notepad as an administrator, click File, click Open, navigate to C:\Windows\System32\drivers\etc, change the file type dropdown to All Files, and open the file named hosts. Add a new line at the bottom in this format: 192.168.X.X HOSTNAME — replacing the values with the host computer’s actual IP address and computer name. Save the file. The workstation now resolves the hostname correctly regardless of DNS state.
Rebuild the .ND file on the host computer after resolving the DNS issue. The .ND file records the hostname at the time it was created, and an outdated .ND file points workstations to the wrong location. Open QuickBooks Database Server Manager on the host computer, go to the Scan Folders tab, confirm the folder that stores your company file is listed, and click Scan. This regenerates the .ND file with the current correct network information and removes the stale address that was causing connection failures.
6. Database Server Manager Not Running: The Host Stops Serving the File
What Database Server Manager Does?
QuickBooks Database Server Manager is a separate application that Intuit requires on the computer that stores the company file. Its job is to manage multi-user access — it controls which workstations can connect simultaneously, handles the data traffic between the host and each workstation, and creates and maintains the .ND file that records the company file’s network location. Without Database Server Manager running correctly on the host, no workstation can open the company file in multi-user mode, regardless of how perfectly the firewall and services are configured.
A Windows security update can disable Database Server Manager in two ways. The update can change the startup type of the QuickBooksDBXX service from Automatic to Manual, so the service no longer starts when the computer boots. The update can also change the permissions on the folder where the company file is stored, blocking Database Server Manager from scanning that folder and creating the .ND file workstations need to connect.
How to Restore and Verify Database Server Manager?
Open the Windows Start menu and search for QuickBooks Database Server Manager. Open it on the host computer. If the Scan Folders tab shows no company files listed or the status shows a service error, first confirm the folder containing your company file is added to the scan list. Click Scan Now. The scan restarts the background service, verifies the folder permissions, and recreates the .ND file for every company file in that folder.
Confirm the QuickBooksDBXX service is set to start automatically. Open services.msc, find QuickBooksDBXX, double-click it, set Startup type to Automatic, and go to the Recovery tab to set all three failure options to Restart the Service. This prevents a single post-update service stoppage from leaving the host computer inaccessible until someone manually intervenes. Restart the host computer after saving these settings and confirm workstations can open the company file.
If Database Server Manager cannot scan the company file folder because of a permissions error, right-click the folder in Windows Explorer, select Properties, click the Security tab, and confirm the Windows user account that runs the QuickBooksDBXX service has Full Control permissions on that folder. A security update that tightens file system permissions can revoke this access. Granting Full Control again allows Database Server Manager to scan the folder and rebuild the .ND file.
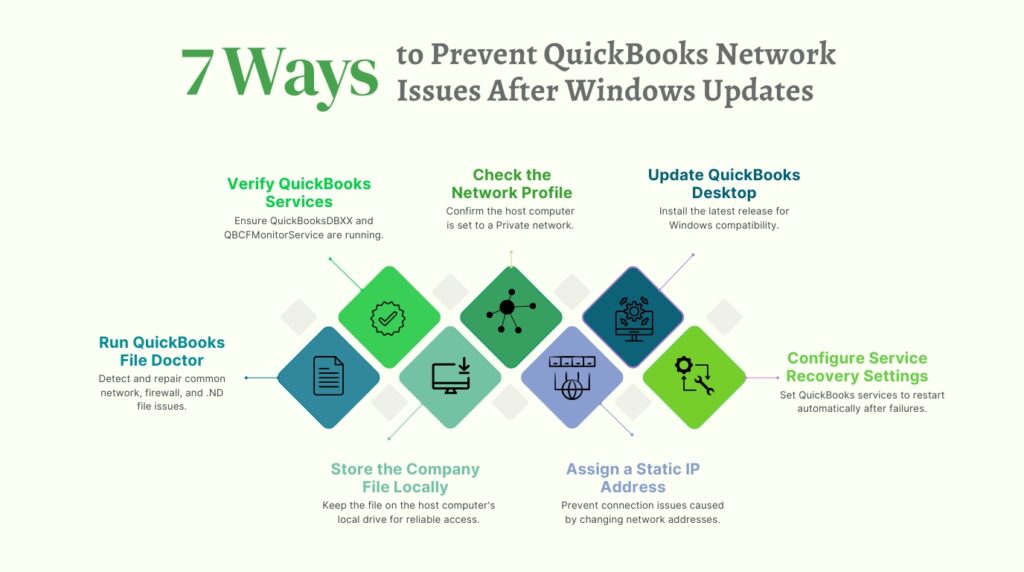
7. Prevention: Keep QuickBooks Network Access Stable After Every Windows Update
Every Windows security update is a potential source of QuickBooks network disruption. A 10-minute post-update check prevents all of the problems this article covers. Perform these steps immediately after every major Windows update, before anyone in the office opens QuickBooks:
- Run QuickBooks File Doctor after every Windows update: Open QuickBooks Tool Hub from Intuit’s official website, go to Network Issues, and run QuickBooks File Doctor. The tool scans the firewall configuration, service status, and .ND file integrity, and repairs the most common update-related problems automatically before they surface as errors.
- Verify both QuickBooks services on the host computer: Open services.msc on the host computer after every Windows update. Confirm QuickBooksDBXX and QBCFMonitorService are both set to Automatic and show a Running status. If either shows Stopped, right-click it and select Start before anyone opens QuickBooks.
- Check the network profile on the host computer: Open Settings, go to Network and Internet, click the active connection, and confirm the profile reads Private. A Public profile disables the file sharing that QuickBooks multi-user mode depends on. Change it to Private before opening QuickBooks on any workstation.
- Update QuickBooks Desktop to the latest release: Open QuickBooks, go to Help, select Update QuickBooks Desktop, and install all available updates. Intuit releases product updates that address compatibility problems introduced by specific Windows security patches.
- Set service recovery options to restart automatically: For both QuickBooksDBXX and QBCFMonitorService, open their Properties in services.msc, go to the Recovery tab, and set the First failure, Second failure, and Subsequent failures dropdowns to Restart the Service. This prevents a stopped service from remaining stopped until someone notices an error.
- Assign the host computer a static IP address: A static IP address does not change when the computer restarts or when Windows updates reset the network adapter configuration. Setting the host to a static IP eliminates the DNS resolution failures that follow an update that changes the host’s assigned address, keeping .ND files accurate at all times.
- Store the company file on the host computer’s local hard drive: Intuit recommends keeping the company file on the local drive of the dedicated host computer. External drives and network-attached storage devices add extra connection layers that security updates can disrupt independently of the QuickBooks configuration.
Conclusion
Windows security updates protect your computer from real threats, but they change the firewall rules, network profiles, and service permissions that QuickBooks Desktop depends on for multi-user access. The H202 and H505 errors, the QBCFMonitorService failures, and the firewall port blockages that appear after an update are not software defects. They are predictable outcomes of a security patch that modified settings QuickBooks was relying on.
Every problem this article covers has a verified cause and a documented fix based on Intuit’s guidance. QuickBooks Tool Hub — available free from Intuit’s official website — resolves most post-update network problems automatically through its QuickBooks File Doctor tool. For problems the tool does not resolve automatically, such as DNS failures, incorrect hosting on workstations, or folder permission changes, the step-by-step instructions in each section restore access without requiring an outside technician.
A consistent post-update check protects your team’s access to the company file after every Windows update. Confirm both QuickBooks services are running, verify the network profile is Private, run QuickBooks File Doctor, and update QuickBooks to its latest release. These four steps, done immediately after every Windows update, eliminate the hours of downtime that an undiagnosed network blockage causes during payroll runs, month-end closes, and tax filing deadlines.
Frequently Asked Questions
Q1. My workstations get H202 errors only after a Windows update — is QuickBooks broken?
H202 errors after a Windows update are not a QuickBooks defect. The update reset Windows Firewall rules or changed the network profile from Private to Public, which removed the access permissions QuickBooks multi-user mode requires. Run QuickBooks File Doctor from Intuit’s Tool Hub immediately after the update to restore the firewall exceptions. Adding the post-update check to your maintenance routine prevents this from recurring after future updates.
Q2. Can I install Windows security updates without disrupting QuickBooks network access?
Yes. Install the update, restart the computer, and immediately run the four-step post-update check: confirm QuickBooksDBXX and QBCFMonitorService are both running in services.msc, verify the network profile is Private in Settings, run QuickBooks File Doctor to restore firewall port rules, and update QuickBooks to its latest release from Help > Update QuickBooks Desktop. These steps take under 10 minutes and prevent every common post-update network error documented in this article.
Q3. The QuickBooksDBXX service keeps stopping after every restart — what is the permanent fix?
Open services.msc, double-click QuickBooksDBXX, set the Startup type to Automatic, and go to the Recovery tab. Set the First failure, Second failure, and Subsequent failures dropdowns all to Restart the Service. Click Apply and OK. This configuration makes Windows restart the service automatically whenever it stops, without requiring manual intervention. If the service stops and restarts in a loop, a firewall rule is blocking QBDBMgrN.exe — add a program exception for that file in Windows Defender Firewall.
Q4. Workstations can ping the host by IP address but QuickBooks still fails with H202 — what is wrong?
A successful ping by IP address confirms the physical network connection is working but does not confirm that QuickBooks’ specific ports are open or that hostname resolution is working. Two things to check: first, ping the host computer by name (not by IP) from the workstation — if that fails, add the hostname and IP to the workstation’s hosts file as described in Section 5. Second, confirm the QuickBooks port rules exist in Windows Defender Firewall for the ports your version requires, or run QuickBooks File Doctor to restore them automatically.
Q5. The company file opens on the host computer but not on any workstation — where do I start?
This pattern confirms the problem is on the host side, not on the workstations. Start on the host computer in this order: open services.msc and confirm QuickBooksDBXX and QBCFMonitorService are both set to Automatic and Running; check that the network profile is Private in Settings; open QuickBooks Database Server Manager and confirm it shows your company file as connected; and run QuickBooks File Doctor to check for firewall and .ND file issues. Also verify no workstation has Host Multi-User Access turned on — only the host computer should host the company file.
Anusmita is a seasoned content writer who brings perspective to words. As a writer, she enriches her work with a journalistic aptitude, utilising her training in Mass Communication and Journalism. She loves to travel and explore, which imparts a greater sense of understanding, maturity, and experience that are reflected in her content.
Beyond her professional work, Anusmita enjoys painting, singing, dancing, and spending time planting. She is also a self-proclaimed foodie who loves exploring different cuisines, an interest that further adds to her curiosity and perspective as a writer.
Leave a Reply