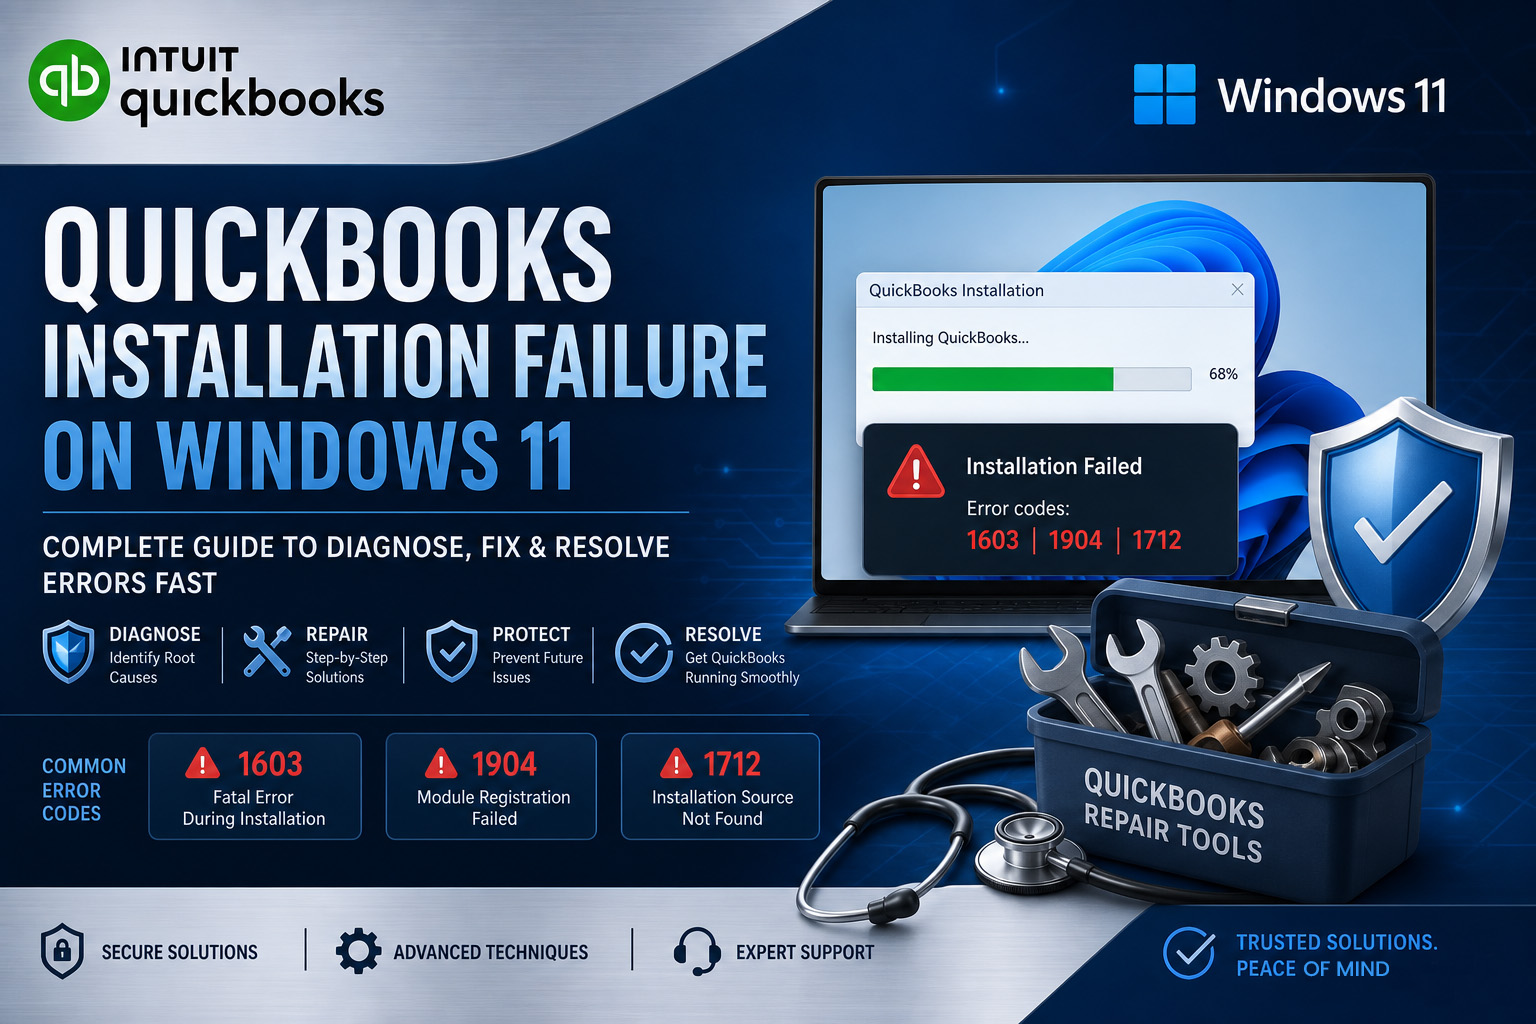
QuickBooks Desktop installation fails on Windows 11 for a small, specific set of reasons – and each reason produces a different error code that points directly to the correct fix. The installation does not fail randomly. It fails because Windows 11 changed how it manages security policies, software components, and installation permissions compared to Windows 10, and QuickBooks’ installer relies on all three of those things to work correctly. Understanding exactly what stopped the installation is the fastest path to fixing it.
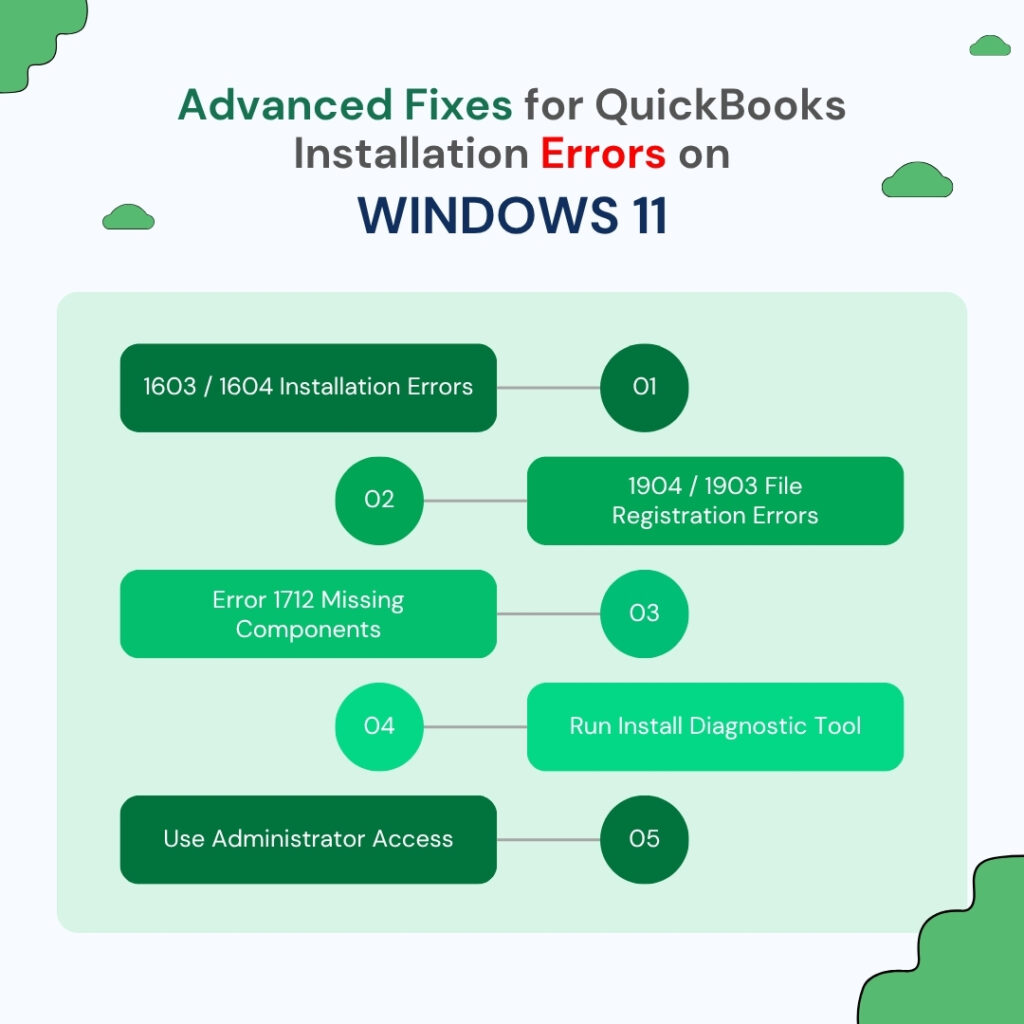
The error codes that appear when QuickBooks installation fails on Windows 11 belong to three main families: the 1600 series (Error 1603, 1604, 1612) which covers failures caused by Windows components or security policies, the 1900 series (Error 1904, 1903) which covers failures caused by specific program files that did not register correctly, and Error 1712 which covers failures caused by missing Windows components entirely. Each family has a specific set of documented causes and a specific repair sequence. This article covers all three families with the advanced fixes that resolve each one when the standard Tool Hub steps have already been tried.
This article is specifically for Windows 11 installation failures that have already gone through the basic steps – running the QuickBooks Install Diagnostic Tool, downloading a fresh installer from Intuit’s official site, and verifying that Windows 11 is a supported 64-bit edition. All of those steps should be completed before the advanced fixes in this article. The advanced fixes address the deeper Windows 11-specific causes that the basic steps cannot reach.
Table of Contents
Quick Diagnosis: Match Your Error Code to Its Cause
Find the exact error code from the failed installation in the table below before reading further.
| Error Code | Plain-English Meaning | Root Cause on Windows 11 | Advanced Fix to Start With |
|---|---|---|---|
| 1603 | “The update installer has encountered an internal error” or “MSi returned 1603: Fatal error during installation” | Windows security policy blocking installation, damaged .NET Framework or MSXML, Windows Installer service not running, or antivirus intercepting the install | Advanced Fix 1: Security Policy Check, then Fix 2: Windows Components |
| 1604 | Installation suspended or incomplete | Another program or Windows process was using files that QuickBooks needed to replace during installation | Advanced Fix 3: Selective Startup Installation |
| 1612 | Installation source files cannot be found | QuickBooks installer lost access to its source files during the installation (common when installing from a network location) | Advanced Fix 4: Local Drive Installation |
| 1712 | One or more missing Windows components required for QuickBooks | Windows 11 update removed or changed a component QuickBooks needs (.NET Framework, MSXML, or Visual C++) | Advanced Fix 2: Windows Components Repair |
| 1904 | “[File path/name/extension] failed to register” | A specific QuickBooks DLL file (a shared program library that Windows programs use) could not write itself to the Windows registry during installation | Advanced Fix 5: Administrator Account Installation |
| 1903 | System does not meet minimum requirements | QuickBooks installer detected an incompatible Windows version, insufficient disk space, or a 32-bit Windows 11 installation (QuickBooks requires 64-bit) | Advanced Fix 6: System Requirements Verification |
| 1311 | Source file not found: Data1.cab | The installer’s cabinet file – the compressed package of installation files – could not be found at the expected path, usually because it was not downloaded completely | Download a fresh installer from Intuit’s official site; clear temp files first |
Why Does Windows 11 Specifically Cause QuickBooks Installation Failures?
Windows 11 introduced three changes that directly affect how QuickBooks installs: stricter security policies that control which programs can install software and where, a change in how Windows manages shared software components (.NET Framework, MSXML, and Visual C++), and an updated Windows Installer service that behaves differently from the Windows 10 version. QuickBooks Desktop 2022 and later were designed for Windows 11, but even compatible versions encounter installation failures when these three Windows 11 systems are configured in ways that block the installer.
Windows 11’s security policies include a Group Policy setting – a rule applied to the entire computer by an administrator – called “Prohibit User Installs.” This setting, when enabled, prevents any user from installing software on the computer. Intuit’s own community support team confirmed directly: this Group Policy setting causes Error 1603 when enabled, because the QuickBooks installer is classified as a user-initiated installation even when run by an administrator account. Business computers managed by an IT department frequently have this setting enabled as a security measure.
Windows 11 also changed how it manages the Windows Installer service – the Windows background program that handles all software installations on the computer. The Windows Installer service must be running and set to a specific startup type for any installation to succeed. On Windows 10, this service ran automatically and reliably. On Windows 11, certain security updates and Group Policy configurations have changed its default behavior, causing it to start in a restricted mode that blocks QuickBooks’ installer from completing its file-write operations.
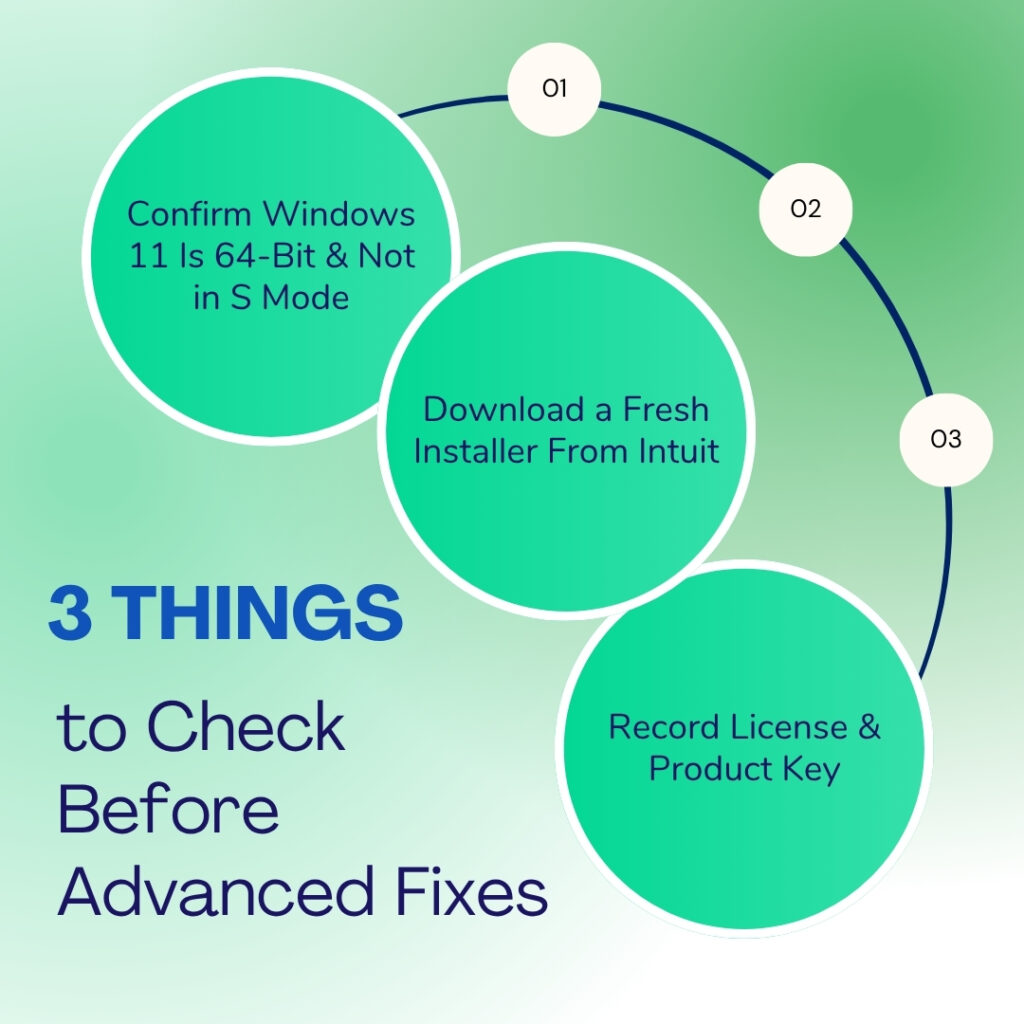
Before Starting the QuickBooks Advanced Fixes: Three Required Checks
Before starting the QuickBooks advanced fixes apply the below given three required checks. They are:
- Check 1: Confirm Windows 11 Is 64-Bit and Not S Mode
- Check 2: Download the Installer Fresh From Intuit’s Official Website
- Check 3: Record the License Number and Product Key Before Starting
Check 1: Confirm Windows 11 Is 64-Bit and Not S Mode
QuickBooks Desktop 2022 and later versions require a 64-bit Windows 11 installation. A 64-bit operating system is a version of Windows that can use more than 4 GB of memory and run modern software at full capacity. QuickBooks will not install on a 32-bit Windows system – the installer stops with Error 1903. Check the system type by going to Settings > System > About > System Type. The field must read “64-bit operating system.” Windows 11 S Mode – a restricted version of Windows that only allows software from the Microsoft Store – also blocks QuickBooks installation. Windows 11 S Mode can be turned off permanently through Settings > System > Activation > Switch out of S mode.
Check 2: Download the Installer Fresh From Intuit’s Official Website
An incomplete or partially downloaded QuickBooks installer is one of the most common causes of Error 1311 and Error 1603. A download that was interrupted by a network drop, a browser tab that closed before the download finished, or a file saved from an unofficial site rather than Intuit’s own download page all produce damaged installer files. Intuit’s official support team confirms: download QuickBooks installation files only from Intuit’s official website. The installer file is approximately 400 to 600 MB and must download completely before it is run. Check the file size after downloading – a file significantly smaller than 400 MB was not fully downloaded.
Check 3: Record the License Number and Product Key Before Starting
Recording the QuickBooks license number and product key from Help > About QuickBooks (or from the original purchase email or box) before starting any installation attempt ensures these are available even if the installation modifies registry entries where the license was previously stored. The license number is required to activate QuickBooks after installation. A license number that cannot be found after a failed installation requires contacting Intuit’s support team to retrieve – which adds time to the resolution process. Having it written down before starting eliminates this risk entirely.
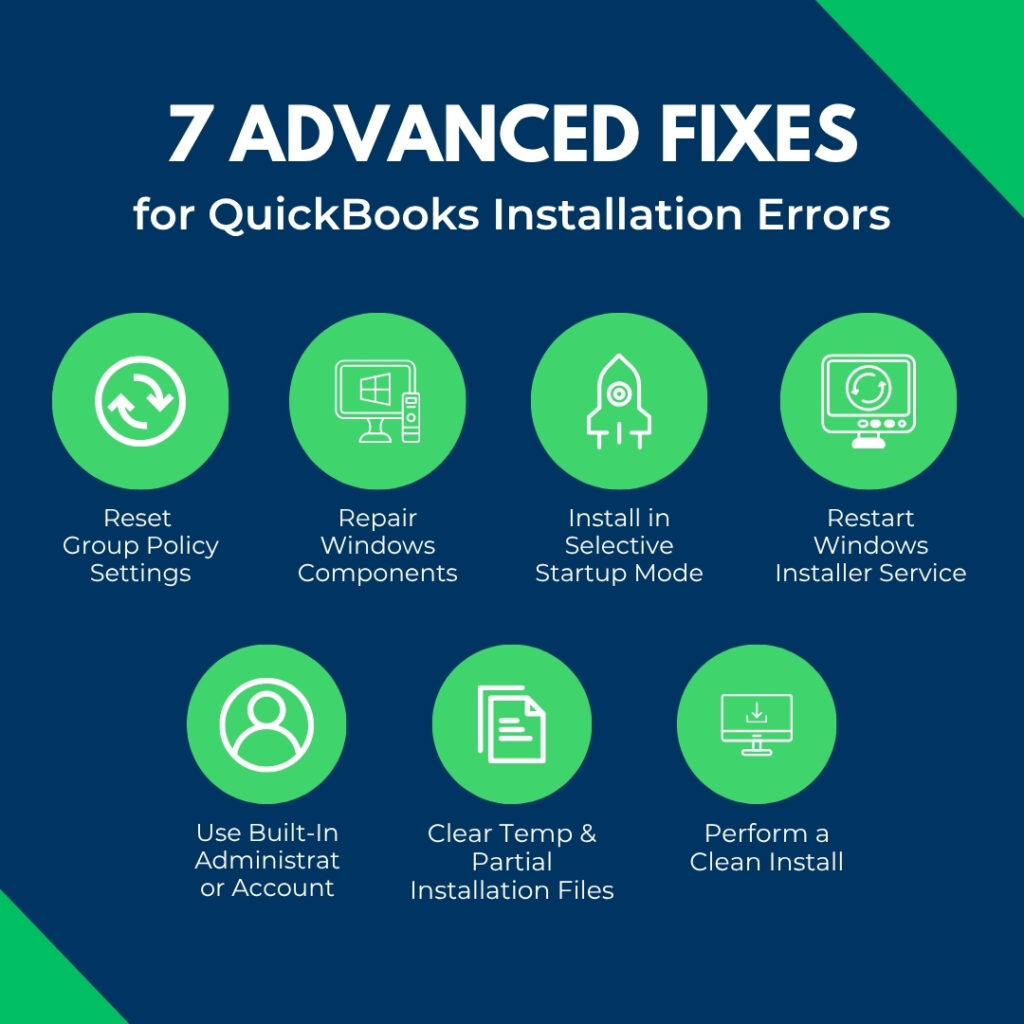
QuickBooks Advanced Fix 1: Check and Reset the Windows 11 Group Policy Security Setting
What This Fix Addresses?
Windows Group Policy is a system that administrators use to apply rules to a Windows computer – rules about which programs can run, which settings users can change, and which types of installations are permitted. The Group Policy setting named “Prohibit User Installs” specifically controls whether users can install software. Intuit’s community support team confirmed directly: when this policy is set to Enabled, it causes Error 1603 during QuickBooks installation. Setting it to “Not Configured” removes the restriction and allows the QuickBooks installer to proceed.
This fix is specifically relevant for computers in business environments managed by an IT department, where Group Policy settings are frequently applied to control software installation. A computer that is part of a Windows domain – a network where all computers are managed centrally by a domain controller (a server that applies rules to all computers on the network) – may have this policy applied from the server rather than locally. In a domain environment, the fix requires the IT administrator to change the policy at the server level, not just on the individual computer.
How to Check and Reset the Group Policy Setting?
Press Windows + R to open the Run dialog. Type gpedit.msc and press Enter. This opens the Local Group Policy Editor – available on Windows 11 Pro, Enterprise, and Education editions. Navigate to: Computer Configuration > Administrative Templates > Windows Components. Look for the setting named Prohibit User Installs. Double-click it. If it shows Enabled, change it to Not Configured and click Apply > OK. Close the Group Policy Editor and retry the QuickBooks installation.
Windows 11 Home edition does not include the Group Policy Editor (gpedit.msc). On Home edition, the Group Policy restriction is not the cause of the installation failure if gpedit.msc does not open. The next most likely cause on Home edition is the Windows Installer service or Windows components – proceed to Advanced Fix 2.
QuickBooks Advanced Fix 2: Repair the Windows Components That QuickBooks Needs
Why Windows Components Matter for Installation?
QuickBooks installation requires three Windows components to be fully installed and working before setup can complete: Microsoft .NET Framework (a software layer Windows provides that the QuickBooks installer uses to run its setup screens and register program files), MSXML (Microsoft XML Core Services – which the installer uses to read the QBRegistration.dat file, the file that stores QuickBooks’ product registration information), and Microsoft Visual C++ Redistributable files (shared program libraries that both the installer and the installed QuickBooks program use). A damaged or missing version of any one of these three components causes the installation to stop with Error 1603, 1712, or 1904.
Error 1603 specifically includes a variant that reads: “There was a problem installing Microsoft .NET Framework.” This message confirms .NET Framework is damaged and is the direct cause of the installation failure. The QBRegistration.dat file reference in Error 1603 – the full message reads: “QuickBooks encountered an issue accessing this registration document. Confirm MSXML 4 is appropriately installed: C:\Documents and Settings\All Users\Application Data\COMMON FILES\Intuit\QuickBooks\QBRegistration.dat” – confirms MSXML damage when it appears.
Fix 2A: Run the QuickBooks Install Diagnostic Tool
Download the QuickBooks Tool Hub version 1.6.0.8 from Intuit’s official support page. Open it. Click Installation Issues in the left menu. Click QuickBooks Install Diagnostic Tool. Allow it to run – it takes 15 to 20 minutes. The tool detects which of the three components (.NET Framework, MSXML, C++) is damaged or missing and reinstalls the correct version automatically. Restart the computer when it finishes. Retry the QuickBooks installation.
Fix 2B: Manually Repair .NET Framework Through Windows Features
The QuickBooks installer requires both .NET Framework 3.5 and .NET Framework 4.8 to be enabled and functional on Windows 11. .NET Framework 3.5 is not enabled by default on Windows 11 – it must be turned on manually through Windows Features. A missing .NET Framework 3.5 causes the QuickBooks installer to stall at specific setup steps that depend on older .NET code paths.
Press Windows + R, type control panel, and press Enter. Go to Programs > Turn Windows Features On or Off. Scroll down and find .NET Framework 3.5 (includes .NET 2.0 and 3.0). Check the box next to it. Click OK. Windows will download and install the component. Also confirm .NET Framework 4.8 Advanced Services is checked. Restart the computer after both are confirmed enabled.
Fix 2C: Re-register the MSXML Component
MSXML is a set of Windows files that handle XML data processing – XML is a structured text format that programs use to organize and exchange data. QuickBooks reads its registration and license files using MSXML. On Windows 11, MSXML 3 and MSXML 4 must both be registered correctly in Windows for QuickBooks to install and run. On 64-bit Windows systems, registering MSXML requires using the Command Prompt (a text-based Windows tool for running system commands) with administrator rights.
Press Windows, type cmd, right-click Command Prompt, and select Run as administrator. In the Command Prompt window, type each of the following commands one at a time and press Enter after each: regsvr32 msxml.dll, then regsvr32 msxml2.dll, then regsvr32 msxml4.dll. Each command registers the MSXML file with Windows. Close Command Prompt and retry the QuickBooks installation.
QuickBooks Advanced Fix 3: Install QuickBooks in Selective Startup Mode
What Selective Startup Mode Is and Why It Helps?
Selective Startup mode is a Windows state where the computer starts with only the essential Microsoft programs and services running – all third-party programs, antivirus software, and non-essential background services are disabled. Intuit’s own Error 1603 documentation specifically recommends installing QuickBooks in Selective Startup when standard installation fails. The reason is that antivirus programs and other background software can intercept the QuickBooks installer as it writes files to protected Windows folders and either block the write or delete the file after it is written. Selective Startup removes these interferences entirely.
A documented case on Intuit’s community forum involved a QuickBooks Enterprise 2022 installation that failed repeatedly on Windows with Error 1603. After being referred to Microsoft support, who determined it was a QuickBooks issue, the user was advised to install in Selective Startup. This resolved the installation failure that had persisted through multiple standard attempts. A Windows Defender update was later identified as blocking the installer on those attempts – Windows Defender’s real-time protection had been scanning and holding the installation files long enough to cause the installer to time out.
How to Enter Selective Startup and Install QuickBooks?
Press Windows + R, type msconfig, and press Enter. The System Configuration window opens. Click the General tab. Select Selective Startup. Uncheck Load Startup Items. Click the Services tab. Check Hide All Microsoft Services. Click Disable All to disable all non-Microsoft services. Click Apply > OK. Click Restart when prompted.
After the computer restarts in Selective Startup, right-click the QuickBooks installer file and select Run as Administrator. Follow the installation prompts. After QuickBooks installs successfully, return the computer to its normal startup mode: press Windows + R, type msconfig, select Normal Startup on the General tab, click Apply > OK, and restart the computer. Do not leave the computer in Selective Startup permanently – it disables security software and other protective services that the computer needs for daily use.
QuickBooks Advanced Fix 4: Fix the Windows Installer Service
What the Windows Installer Service Is?
The Windows Installer service is a Windows background program – a service that starts automatically with Windows and runs in the background – that manages the installation, update, and removal of all software on the computer. Every time any program installs on Windows, including QuickBooks, the Windows Installer service handles the actual file-writing process. A Windows Installer service that has stopped running, or that is set to a startup type that prevents it from running automatically, causes every software installation to fail. QuickBooks’ installer cannot write its files to the computer without a functioning Windows Installer service.
A documented case on Intuit’s community forum showed QuickBooks Desktop R13P failing with errors 1712, 1603, and 1311 simultaneously. Intuit’s support team confirmed that Error 1712 specifically occurs because of one or more missing Windows components, and that the Windows Installer service being in a stopped or restricted state contributes to all three errors appearing together. The user found that the installer could not locate the Data1.cab file – the compressed package containing all QuickBooks installation files – because the Windows Installer service was not running to manage the extraction process.
How to Restart and Reconfigure the Windows Installer Service?
Press Windows + R, type services.msc, and press Enter. The Windows Services panel opens – a list of all background services on the computer. Scroll down to find Windows Installer in the list. Right-click it and select Properties. In the Properties window, set Startup Type to Manual. Click Start under Service Status to start it if it is not already running. Click Apply > OK. Retry the QuickBooks installation.
A Windows Installer service that shows an error when clicking Start – or that shows the status as “Disabled” and the startup type cannot be changed from the Services panel – indicates the service has been restricted by a Group Policy setting or by a Windows component failure that is outside the scope of QuickBooks troubleshooting. Intuit’s own documentation states directly for this situation: “To fix this, it’s best to reach out to an IT expert or a specialist from Microsoft.” A disabled Windows Installer service that cannot be re-enabled through the Services panel requires Microsoft’s own support tools and expertise.
QuickBooks Advanced Fix 5: Install From a Built-In Administrator Account
Why the Standard Administrator Account Is Not Enough?
Windows 11 has two types of administrator accounts: the standard administrator account (the account most users create with administrator rights) and the built-in Administrator account (a hidden, elevated account that Windows creates automatically and does not restrict with the same User Account Control – UAC – prompts that standard accounts use). UAC is a Windows security feature that asks for permission before any program makes changes to the computer. Even when a user confirms the UAC prompt, some installations running in a standard administrator account still face restrictions on writing to certain protected Windows folders.
Error 1904, which reads “[file path/name/extension] failed to register,” appears when a QuickBooks DLL file cannot write itself to the Windows registry during installation. A DLL file – Dynamic Link Library – is a shared program file that multiple programs can use simultaneously. QuickBooks must register its DLL files in the Windows registry – a database where Windows stores configuration information for all installed programs. A standard administrator account with UAC restrictions can block this registry write, producing Error 1904. Installing from the built-in Administrator account bypasses UAC entirely and gives the installer unrestricted access to register all required files.
How to Enable and Use the Built-In Administrator Account?
Press Windows, type cmd, right-click Command Prompt, and select Run as administrator. In the Command Prompt window, type: net user administrator /active:yes and press Enter. A message reading “The command completed successfully” confirms the built-in Administrator account is now active. Close Command Prompt. Go to the Windows Start menu, click the user account icon, and select Sign out. On the Windows sign-in screen, select the Administrator account (no password is required). Log in, right-click the QuickBooks installer, and select Run as administrator.
After QuickBooks installs successfully, disable the built-in Administrator account immediately to maintain computer security. Return to the standard account, open Command Prompt with administrator rights, and type: net user administrator /active:no. Press Enter. The built-in Administrator account returns to its hidden, disabled state. QuickBooks will continue to work normally from the standard account once it has been installed from the built-in Administrator account.
QuickBooks Advanced Fix 6: Clear Temp Files and Partial Installation Remnants
Why Previous Failed Installations Cause Subsequent Failures?
Every time a QuickBooks installation fails partway through, it leaves partial files in the computer’s temporary folders. A temporary folder – commonly referred to as the Temp folder – is a location Windows uses to store files that programs are actively working with during tasks like installations and updates. The QuickBooks installer extracts its files to the Temp folder as the first step of installation. A second installation attempt that encounters partial files from a previous failed attempt can conflict with those leftover files and fail again for a different reason than the original failure.
Partial QuickBooks installation directories – empty or incomplete folders at C:\Program Files\Intuit\QuickBooks or C:\ProgramData\Intuit – also interfere with new installation attempts. The installer checks whether QuickBooks is already installed by looking for these folders. A partial folder from a failed previous attempt makes the installer behave as if QuickBooks is already partially installed, which causes it to attempt a repair rather than a fresh install, which fails because the partial installation does not have the required files for a repair to work from.
How to Clear Temp Files and Partial Directories?
Press Windows + R, type %temp%, and press Enter. This opens the Windows Temp folder. Select all files (Ctrl + A) and delete them. Skip any files that cannot be deleted because they are in use – click Skip for each. Then press Windows + R again, type temp, and press Enter. Delete all files in this second temp folder as well. Open File Explorer and navigate to C:\Program Files\Intuit. Delete any QuickBooks folders present. Navigate to C:\ProgramData\Intuit and delete any QuickBooks folders (keep the Entitlement Client folder if it is present – this holds the license file). Restart the computer and retry the installation.
QuickBooks Advanced Fix 7: Perform a Clean Install Using Intuit’s Clean Install Tool
When a Clean Install Is the Correct Step?
The Clean Install Tool is a free program from Intuit that removes a QuickBooks installation more completely than the standard Windows uninstall process. When QuickBooks was previously installed on the computer – even if it was removed through the Control Panel – the standard uninstall leaves behind registry entries, shared component registrations, and configuration files. These leftover items from the old installation interfere with the new installation in ways that produce Error 1603, Error 1904, and Error 1712. The Clean Install Tool specifically finds and removes these leftover items before the new installation begins, giving the installer a completely clean starting point.
A clean install is the correct step when all of the following apply: a previous version of QuickBooks was installed on this computer at any point, at least one standard installation attempt has failed, and the Install Diagnostic Tool has already been run. Running the Clean Install Tool in this sequence – after the Diagnostic Tool has repaired Windows components and after Selective Startup has removed antivirus interference – produces the highest probability of a successful installation on Windows 11.
How to Use the Clean Install Tool?
Download the QuickBooks Clean Install Tool from Intuit’s official support page. Close all QuickBooks programs. Open Control Panel > Programs > Programs and Features. Find QuickBooks in the list, right-click it, and select Uninstall. Follow the uninstall prompts. After the uninstall finishes, run the Clean Install Tool – it finds and removes the files that the standard uninstall left behind. Restart the computer after the Clean Install Tool completes. Download the QuickBooks installer fresh from Intuit’s website. Right-click the installer and select Run as administrator. Follow the installation prompts.
QuickBooks Advanced Fixes Summary: Which Fix to Use for Each Error
| Error | First Advanced Fix | Second Advanced Fix if First Does Not Work | When to Escalate to IT / Intuit Support |
|---|---|---|---|
| 1603 (security policy) | Fix 1: Reset Group Policy (gpedit.msc > Prohibit User Installs > Not Configured) | Fix 3: Selective Startup installation | Windows Installer service is Disabled and cannot be enabled from services.msc |
| 1603 (.NET / MSXML) | Fix 2A: QuickBooks Install Diagnostic Tool (Tool Hub > Installation Issues) | Fix 2B: Enable .NET 3.5 in Windows Features; Fix 2C: Re-register MSXML via Command Prompt | Install Diagnostic Tool fails to complete or reports an error during the run |
| 1604 (suspended install) | Fix 3: Selective Startup (close all background apps) | Fix 6: Clear Temp files and partial directories | Problem recurs after multiple Selective Startup attempts |
| 1612 (source not found) | Fix 4B: Save installer to C:\ root and run from local drive (not network or USB) | Fix 6: Clear Temp files; download fresh installer from Intuit | Network-based installations that fail on all workstations require IT review |
| 1712 (missing components) | Fix 2A: Install Diagnostic Tool | Fix 2B: Enable .NET 3.5 in Windows Features | Windows Installer service is stopped and cannot be started |
| 1904 (file failed to register) | Fix 5: Enable and use the built-in Administrator account for installation | Fix 7: Clean Install Tool followed by fresh install | Error persists after clean install with built-in admin account |
| 1311 (Data1.cab not found) | Download fresh installer from Intuit; clear Temp folder before running | Fix 6: Remove all partial install files from Program Files\Intuit | File consistently fails to download even from Intuit’s official site – network issue |
| 1903 (system requirements) | Fix 2B: Confirm Windows 11 is 64-bit (Settings > System > About) | Turn off S Mode (Settings > Activation > Switch out of S Mode) | Computer does not meet hardware minimums – hardware upgrade required |
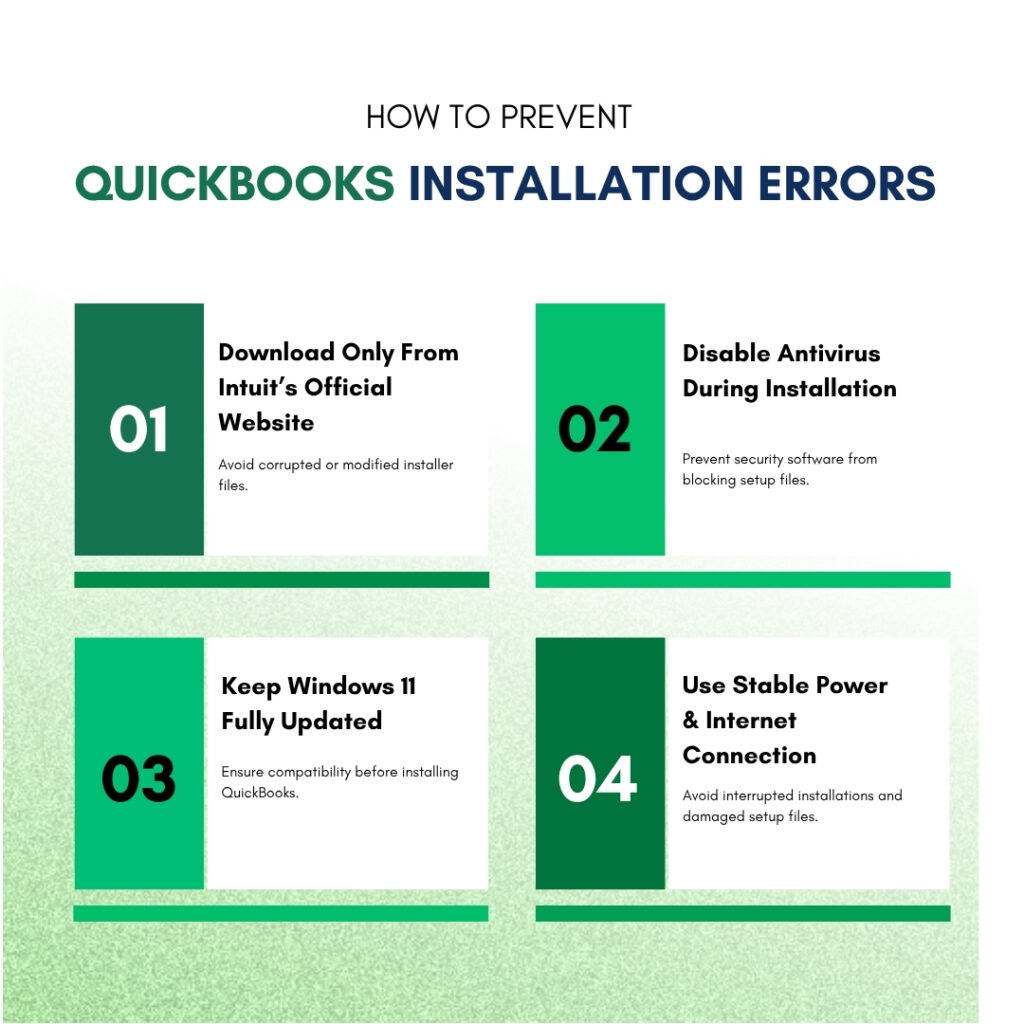
QuickBooks Prevention: Stop QuickBooks Installation Failures From Recurring
- Always Download the Installer From Intuit’s Official Website
QuickBooks installation files downloaded from any source other than Intuit’s official website risk being incomplete, modified, or corrupted. Intuit’s support documentation confirms that users should download QuickBooks installation files only from the official Intuit website. Unofficial downloads produce Error 1311, 1603, and 1604 because the downloaded file is missing sections or was altered during distribution. Bookmarking Intuit’s official download page and using it for every future installation eliminates download-source errors entirely.
- Disable Real-Time Antivirus Protection Only During Installation
Antivirus real-time protection – the continuous scanning of all files being written to the computer – is a documented cause of QuickBooks installation failure on Windows 11. A Windows Defender update identified in a documented community forum case caused the installer to take nearly two hours on some computers and fail outright on others, because Defender was scanning every file the installer wrote. Temporarily disabling real-time protection during installation – through Windows Security > Virus & Threat Protection > Manage Settings > Real-Time Protection > Off – allows the installer to write all files at full speed. Re-enable protection immediately after installation completes.
- Keep Windows 11 Updated Before Installing QuickBooks
Windows updates fix bugs in the Windows Installer service, the .NET Framework, MSXML, and other components that QuickBooks depends on. Installing QuickBooks on a Windows 11 machine that has not received recent Windows updates means the installation relies on older versions of these components that may have known bugs already fixed in pending updates. Checking for and installing all available Windows updates through Settings > Windows Update > Check for Updates before attempting the QuickBooks installation reduces the chance of component-related installation errors.
- Run the Installation With a Stable Power and Internet Connection
A power outage or system shutdown during a QuickBooks installation leaves partial files in the installation directory and Temp folder, produces a damaged registry entry for QuickBooks, and requires the Clean Install Tool to fully clear before a new installation can succeed. Using an uninterruptible power supply (UPS – a battery backup device that keeps the computer running for several minutes after a power outage) during installation prevents power interruptions from corrupting the installer mid-process. An unstable internet connection during a download causes an incomplete installer file that produces Error 1311. A wired ethernet connection rather than Wi-Fi provides the most stable download environment.
Conclusion
QuickBooks installation failures on Windows 11 follow a predictable pattern: the error code identifies the specific Windows component or security setting that blocked the installation, and each error code has a documented fix sequence that resolves it. Error 1603 from a Group Policy setting is fixed by resetting the Prohibit User Installs policy. Error 1603 from damaged .NET Framework or MSXML is fixed by the Install Diagnostic Tool plus manual component repair. Error 1904 from registry write restrictions is fixed by installing from the built-in Administrator account. Error 1712 from missing components is fixed by enabling .NET Framework 3.5 in Windows Features.
The sequence that resolves the most cases across all error types is: run the Install Diagnostic Tool first, clear the Temp folder and any partial installation directories, restart in Selective Startup mode, and run the installer as administrator. This sequence addresses the three most common causes – damaged components, leftover partial installation files, and antivirus interference – in one pass. Following it before attempting a clean install saves the time the clean install takes while resolving most cases.
Intuit’s QuickBooks Tool Hub version 1.6.0.8 – available free from Intuit’s official support page – contains the Install Diagnostic Tool that handles the component repair step. It is the single most useful tool for QuickBooks installation failures and should be the first download after a failed installation. For installation failures that persist after all fixes in this article have been applied, Intuit’s support team and Microsoft’s own specialists for Windows Installer service failures are the correct escalation path, as Intuit’s own documentation confirms for cases where the Windows Installer service cannot be started.
Frequently Asked Questions
1. QuickBooks installed successfully but now shows Error 1603 every time an update is applied. Why is the update failing if the installation worked?
A QuickBooks update that fails with Error 1603 on a computer where the original installation succeeded indicates that a Windows or security configuration changed after the installation – most commonly a Windows Security or Group Policy update that tightened restrictions. QuickBooks updates use the same Windows Installer service and .NET Framework as the original installation.
An update that runs into Error 1603 is encountering the same three causes: Group Policy, damaged Windows components, or antivirus interference. The fastest resolution is to temporarily disable real-time antivirus protection, check the Group Policy setting (Prohibit User Installs), run the update from an administrator account, and retry the update. A documented community forum case showed Windows Defender blocking a QuickBooks Desktop R13P update patch – disabling real-time protection resolved it immediately.
2. The Install Diagnostic Tool ran for 20 minutes and then showed an error. What does this mean?
The Install Diagnostic Tool showing an error during its own run indicates a Windows component problem more severe than the tool is designed to repair on its own. The tool downloads the correct versions of .NET Framework, MSXML, and C++ from Microsoft’s servers and installs them.
An error during this process most commonly means one of the following: the internet connection dropped during the component download (the tool needs an active internet connection throughout its run), Windows’ ability to install the downloaded component is blocked by a policy or a prior damaged component that prevents replacement, or Windows’ own update service – which the Diagnostic Tool uses to install components – has an error.
Running Windows Update (Settings > Windows Update > Check for Updates) and installing all available Windows updates before retrying the Diagnostic Tool often resolves errors the Diagnostic Tool encountered on the first run.
3. QuickBooks installed on one Windows 11 computer in the office without any problem, but fails with Error 1904 on two other identical computers. Why is the same error appearing only on specific computers?
Error 1904 on specific computers but not others in the same office confirms the problem is in those specific computers’ Windows configurations, not in the QuickBooks installer itself. The computers where it works have Windows user accounts or Windows security settings that allow the QuickBooks DLL files to register in the Windows registry without restriction.
The computers where it fails have a restriction blocking that registry write – most commonly from a different UAC (User Account Control) setting, a stricter security policy applied to those specific computers, or a Windows user account that has different permission levels than the accounts on the computers where it worked.
Testing the installation on the failing computers from the built-in Administrator account – using the net user administrator /active:yes command – isolates whether the issue is the user account or the Windows configuration.
4. Error 1311 appears: ‘Source file not found: Data1.cab.’ The installer file was downloaded from Intuit’s official page. How can the file be missing if it was just downloaded?
Data1.cab is a cabinet file – a compressed archive that contains the QuickBooks program files that the installer unpacks during setup. The installer extracts Data1.cab to the Windows Temp folder as one of its first steps, and then reads from it throughout the rest of the installation. Error 1311 appears when the extraction fails or when the Temp folder does not have enough free space for the cabinet file.
The cabinet file in a QuickBooks installer is typically 300 to 500 MB when extracted. A Temp folder on a drive with less than 1 GB of free space cannot hold the extracted files, causing the installer to report that Data1.cab cannot be found even though the installer itself is intact. Clearing the Temp folder (%temp% in the Run dialog), verifying at least 2.5 GB of free space on the system drive (C:), and retrying the installation resolves most Error 1311 cases without requiring a new download.
5. All fixes have been applied and QuickBooks still fails to install. What is the option of last resort?
A QuickBooks installation failure that survives the Group Policy fix, Selective Startup installation, the Install Diagnostic Tool, the Clean Install Tool, and installation from the built-in Administrator account points to a Windows environment problem that is outside the QuickBooks troubleshooting scope.
Intuit’s own documentation states directly: for Windows Installer service failures, contact an IT expert or a specialist from Microsoft. At this stage, the Windows environment itself – the registry, the Windows component store, or a Group Policy applied from a domain controller – has a problem that requires Windows-level repair tools.
Microsoft’s System File Checker (run by typing sfc /scannow in an administrator Command Prompt) scans and replaces damaged Windows system files and resolves some deep Windows environment issues that produce persistent installation failures. If sfc /scannow also reports errors it cannot fix, a Windows 11 repair installation – which reinstalls Windows over itself without deleting data – is the documented last resort before a full Windows reinstall.
Anusmita is a seasoned content writer who brings perspective to words. As a writer, she enriches her work with a journalistic aptitude, utilising her training in Mass Communication and Journalism. She loves to travel and explore, which imparts a greater sense of understanding, maturity, and experience that are reflected in her content.
Beyond her professional work, Anusmita enjoys painting, singing, dancing, and spending time planting. She is also a self-proclaimed foodie who loves exploring different cuisines, an interest that further adds to her curiosity and perspective as a writer.
Leave a Reply