QuickBooks Desktop multi-user mode lets multiple people in a business work on the same company file at the same time from different computers. A correctly built network makes that sharing fast, stable, and error-free. A poorly built network produces H202 errors, locked files, slow performance, and data corruption — problems that stop accounting work during the most critical parts of the business month.
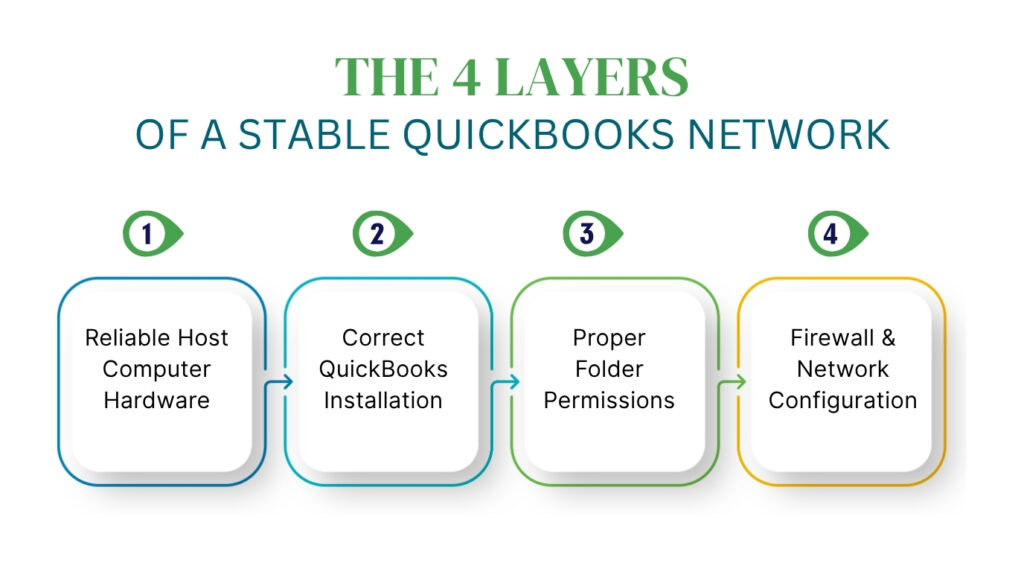
The network setup for QuickBooks Desktop has four layers that must all be correct simultaneously: the host computer hardware must meet minimum specifications, the software must be installed and configured correctly on both the host and workstations, the Windows folder permissions must grant the right service accounts the right access levels, and the firewall must allow QuickBooks traffic through its specific ports. A gap in any one of these four layers produces errors in the other three.
This article covers every best practice for setting up a QuickBooks Desktop network in a US business — what each practice requires, why it matters for your accounting work, and the exact steps that put each element in place. All recommendations in this article are based on Intuit’s official documentation and system requirements.
Table of Contents
At a Glance: What a Correct QuickBooks Network Looks Like
Before reading the full setup guide, review this reference table to confirm which elements your current network has in place:
| Network Element | Correct Setup | Common Mistake to Avoid |
| Host computer role | One dedicated computer stores and shares the company file | Multiple computers set to host, causing H505 conflicts |
| QuickBooks installation type | Custom and Network install on host; standard install on workstations | Express install on host omits network sharing setup |
| Database Server Manager | Installed and running on host; scan completed | Not installed; services set to Manual startup |
| Folder permissions | QBDataServiceUserXX has Full Control over the company file folder | Service account missing from Security tab; folder set to Read Only |
| Company file location | Local hard drive of the host computer | External USB drive, desktop shortcut, or network-attached storage |
| Network connection | Wired Ethernet connection on the host computer | Wireless connection on the host causes dropped connections |
| Firewall configuration | QuickBooks ports open; program exceptions added | Default firewall blocks QuickBooks after Windows updates |
Tip: Work through each row in this table before reading the full sections below. Identify which elements are already correct and which need attention.
1. Choosing the Right Host Computer
What the Host Computer Does
The host computer is the one computer in a QuickBooks network that stores the company file — the .QBW file that contains all accounting data — and shares it with every other computer on the network. Workstations are the other computers that connect to the network and open the company file from the host. The host computer does not need to be a dedicated server in a small business setup, but it must meet minimum hardware requirements and stay powered on and connected to the network during all business hours.
QuickBooks Desktop 2024 requires the host computer to have a minimum processor speed of 2.4 GHz. The RAM requirement for the host computer scales with the number of simultaneous users: Intuit’s system requirements document 8 GB of RAM for 1 to 5 users, 12 GB for up to 10 users, 16 GB for up to 15 users, and 20 GB or more for 20 or more users. A host computer that does not meet the RAM requirement for its user count produces slow performance, frequent disconnections, and Company File in Use errors throughout the business day.
The host computer must run a 64-bit version of Windows. Intuit’s system requirements specify that QuickBooks Desktop 2024 requires a 64-bit operating system and does not run on 32-bit systems. Additionally, Intuit requires administrator rights on the server computer when hosting multi-user access. The Windows user account that runs QuickBooks and manages the Database Server Manager must have administrator-level rights on the host computer.
Dedicated Server vs. Peer-to-Peer
A dedicated server is a computer used only for hosting the company file — no one opens QuickBooks directly on it to do accounting work. A peer-to-peer setup uses a regular workstation as the host, meaning someone does accounting work on the same computer that hosts the file for others. Intuit documents three hosting modes for QuickBooks Desktop: dedicated hosting, peer-to-peer hosting, and alternate hosting. A dedicated server is the most stable option because it does not compete for RAM and CPU between the QuickBooks hosting service and a user doing accounting work at the same time.
Peer-to-peer hosting is fully supported by Intuit and works well for small offices with two to three users. The host workstation simply has QuickBooks installed with the Custom and Network install option, has Database Server Manager running, and has hosting turned on. The limitation of peer-to-peer hosting is that the host workstation experiences slowdown during high-demand periods — large report runs, payroll processing, or data rebuild — because those tasks compete with the hosting service for the same RAM and processor.
2. Installing QuickBooks Correctly for a Multi-User Network
Custom and Network Install vs. Express Install
QuickBooks Desktop offers two install types: Express install and Custom and Network install. Express install is the right choice for a single user on a standalone computer. Custom and Network install is the correct choice for any computer that will host company files on a network or that will serve as a dedicated server. Intuit’s install documentation states that Custom and Network install is for multi-user, multi-computer, or server-based setups.
During the Custom and Network install, QuickBooks presents a choice of hosting configuration. Select I’ll be using QuickBooks Desktop on this computer, AND I’ll be storing the company file here so other computers on my network can access it — this option installs both the full QuickBooks program and the Database Server Manager on the host computer. On each workstation, run the standard install; workstations do not need the Database Server Manager because they access the company file from the host rather than hosting it themselves.
All computers on a QuickBooks multi-user network must run the exact same version year of QuickBooks. A workstation running QuickBooks 2023 cannot connect to a company file hosted by a computer running QuickBooks 2024, and vice versa. Intuit’s network setup documentation requires version consistency across all computers. After any version upgrade, update the software on the host computer first, then update every workstation before anyone tries to open the company file in multi-user mode.
How to Turn On Hosting After Installation
After installing QuickBooks on the host computer using the Custom and Network install, turn on multi-user hosting. Open QuickBooks on the host computer, go to the File menu, hover over Utilities, and select Host Multi-User Access. Click Yes when the confirmation prompt appears. The menu option then changes to Stop Hosting Multi-User Access — that label confirms hosting is now active on the host computer.
On every workstation, confirm that hosting is turned off. Open QuickBooks on each workstation without opening the company file, go to the File menu, hover over Utilities, and confirm the option reads Host Multi-User Access. That label means hosting is currently off on that workstation, which is the correct state. Intuit documents that H505, H101, and H303 errors appear specifically when one or more workstations have hosting incorrectly turned on.
3. Setting Up QuickBooks Database Server Manager Correctly
What Database Server Manager Does and Why It Must Be Configured
QuickBooks Database Server Manager is a separate application that runs in the background on the host computer. Its job is to manage how the company file is shared across the network — it controls simultaneous access from multiple workstations, creates and maintains the .ND file (the Network Descriptor file that records the company file’s location), and automatically configures the Windows Firewall to allow QuickBooks traffic through the correct ports. Without Database Server Manager running correctly on the host, no workstation can open the company file in multi-user mode.
Database Server Manager creates a service account called QBDataServiceUserXX on the host computer, where XX is a number linked to the QuickBooks version — QuickBooks 2024 creates QBDataServiceUser34, QuickBooks 2023 creates QBDataServiceUser33, and QuickBooks 2022 creates QBDataServiceUser32. Intuit documents that these accounts are created automatically during installation to manage database connections and services. Each account must have the correct folder permissions to share the company file with the network.
Running the Initial Scan
After installing Database Server Manager on the host computer, run a scan to complete the network setup. Open the Windows Start menu, search for QuickBooks Database Server Manager, and open it. Go to the Scan Folders tab. If the folder containing the company file is not already listed, click Browse and navigate to it. Click Start Scan and wait for the scan to finish. Intuit states that the Database Server Manager scan repairs firewall permissions automatically and creates the .ND file for each company file in the scanned folder.
After the scan completes, confirm that the company file appears in the scan results with a green status indicator. Open QuickBooks on the host computer, go to File, and select Switch to Multi-User Mode. Then open QuickBooks on each workstation and attempt to open the company file. A successful first connection from every workstation confirms the scan completed correctly and the network setup is working. Run this scan again after every QuickBooks version upgrade and after every major Windows update.
Keeping the Services Running
Database Server Manager runs two Windows services on the host computer: QuickBooksDBXX and QBCFMonitorService. Both must be running at all times for workstations to access the company file. Open services.msc from the Windows Start menu on the host computer and confirm both services are present, set to Automatic startup, and show a Running status. Go to the Recovery tab for each service and set the First failure, Second failure, and Subsequent failures dropdowns to Restart the Service. This configuration ensures both services restart automatically after any unplanned interruption.
4. Configuring Folder Permissions for Multi-User Access
Why Folder Permissions Matter?
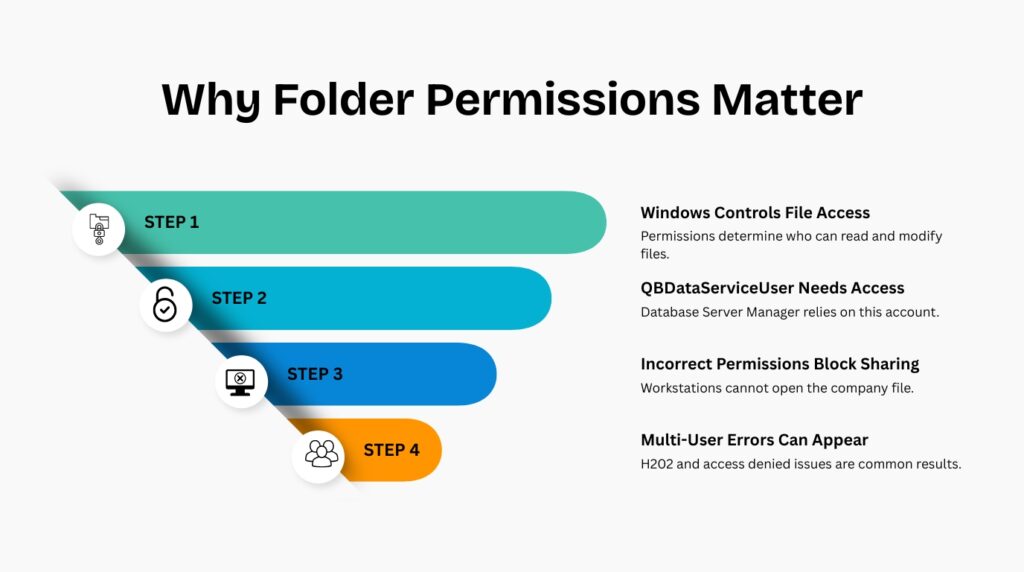
Windows controls which users and programs can read, write, and modify files in any given folder through a permissions system. The company file folder on the host computer must grant specific permissions to the QBDataServiceUserXX service account. Without those permissions, Database Server Manager cannot share the company file with the network, and workstations receive access denied errors when they try to connect. Intuit’s folder and Windows access permissions documentation confirms that multi-user errors can be time-consuming to resolve and that incorrect permissions are among the primary causes.
Each QuickBooks version creates its own QBDataServiceUserXX account — upgrading from QuickBooks 2023 to 2024 creates a new QBDataServiceUser34 account that does not automatically inherit the folder permissions that QBDataServiceUser33 had. This is why multi-user access breaks immediately after a version upgrade even when everything else is configured correctly. After every version upgrade, update the folder permissions to include the new service account.
How to Set Folder Permissions Correctly
Open Windows File Explorer on the host computer and navigate to the folder that contains the company file. Right-click the folder and select Properties. Go to the Security tab and click Edit. Click Add, type QBDataServiceUserXX (replacing XX with your QuickBooks version number), and click OK. Select the account in the list, check Full Control under Allow, and click Apply, then OK. Intuit’s permissions guide specifies Full Control as the required permission level for the QBDataServiceUserXX account on the company file folder.
Also set the sharing permissions on the same folder so that workstations can access it over the network. Right-click the folder, select Properties, go to the Sharing tab, and click Share. In the File Sharing window, add QBDataServiceUserXX and set the permission level to Read/Write. Click Share to save. The folder must have both Security tab permissions and Sharing tab permissions set correctly — Security controls local access and Sharing controls network access, and QuickBooks needs both.
Folder Permissions Reference by QuickBooks Version
| QuickBooks Version | Service Account Name | Required Permission Level |
| QuickBooks Desktop 2024 | QBDataServiceUser34 | Full Control (Security tab) + Read/Write (Sharing tab) |
| QuickBooks Desktop 2023 | QBDataServiceUser33 | Full Control (Security tab) + Read/Write (Sharing tab) |
| QuickBooks Desktop 2022 | QBDataServiceUser32 | Full Control (Security tab) + Read/Write (Sharing tab) |
| QuickBooks Desktop 2021 | QBDataServiceUser31 | Full Control (Security tab) + Read/Write (Sharing tab) |
| All versions | Everyone (group) | Full Control on QuickBooks installation folders in C:\ProgramData |
5. Choosing the Right Location for the Company File
Local Hard Drive of the Host Computer
Store the company file on the local hard drive of the host computer — not on an external USB drive, not on a flash drive, and not directly on a network-attached storage device. Intuit’s guidance on company file location is consistent across all documentation: the company file must be on a local drive of the computer that runs Database Server Manager. External drives and USB devices introduce connection interruptions that corrupt the .TLG transaction log file and produce 6000-series errors.
A solid-state drive (SSD) in the host computer provides significantly better performance than a traditional spinning hard drive. Intuit’s system requirements documentation specifically notes that users should store QuickBooks data files on an SSD for best performance. An SSD reads and writes data much faster than a spinning disk, which directly reduces the time it takes to open large company files, run reports, and save transactions in a multi-user environment.
File Path Length and Naming
The full path to the company file — including every folder name, subfolder name, and the file name itself — must be 210 characters or fewer. Intuit’s documentation on 6000-series errors specifically lists a file path longer than 210 characters as a cause of company file open failures. Check the path length by opening the company file folder in Windows Explorer, copying the full address from the address bar, pasting it into Notepad, and counting the total characters including spaces and backslashes.
Store the company file in a folder with a short, clear name rather than in a deeply nested folder structure. A path like C:\QuickBooks\CompanyFiles\YourCompany.QBW is far safer than C:\Users\Public\Documents\Accounting\QuickBooks\Company Files\2024\CurrentYear\YourCompany.QBW. The shorter path reduces the risk of hitting the 210-character limit and makes it easier to locate the file for backups and Database Server Manager scans.
6. Network Connection: Wired vs. Wireless
Why Wired Connections Are Required for the Host
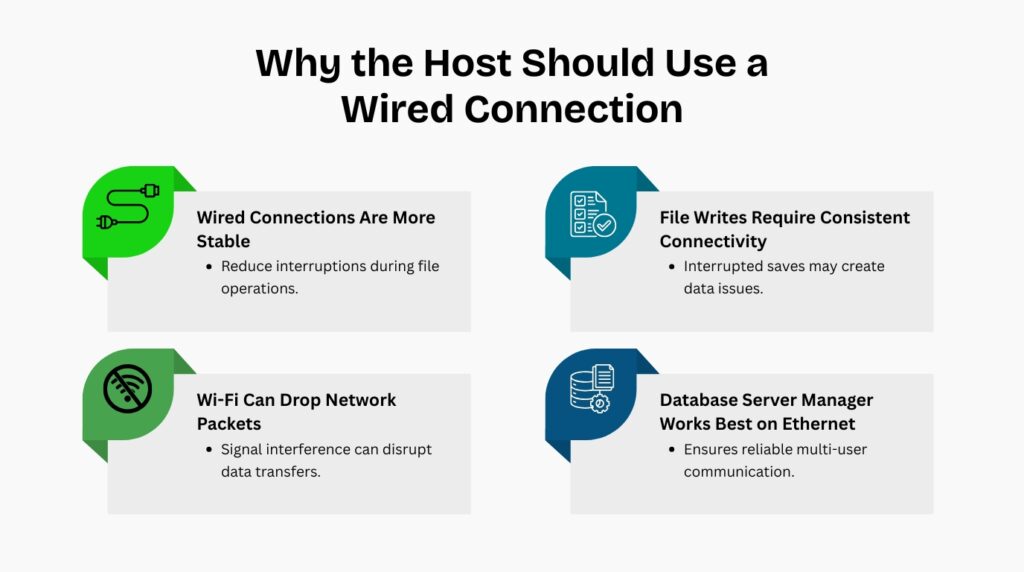
The host computer that stores and shares the company file must connect to the network using a wired Ethernet cable, not a wireless (Wi-Fi) connection. Wireless connections drop packets — small units of data — during normal operation due to signal interference, distance from the router, and competing devices on the same frequency. A dropped packet during a QuickBooks write operation leaves a transaction partially saved, which corrupts the .TLG file and produces data integrity errors that require the Verify and Rebuild Data tools to fix.
A wired Ethernet connection on the host computer guarantees a continuous, uninterrupted link between the company file and the Database Server Manager service. Workstations can use wireless connections without the same risk because they read from and write to the company file in complete transactions — the Database Server Manager on the host handles the file operations and only returns a result to the workstation after the save is confirmed. The host is the only computer where a dropped connection during a write operation can directly damage the company file.
Network Speed and Stability
A standard 100 Mbps (megabits per second) wired network is sufficient for QuickBooks Desktop multi-user access with a small number of users. A Gigabit Ethernet connection — 1,000 Mbps — provides noticeably faster performance with larger company files and more simultaneous users. Gigabit Ethernet equipment, including routers and network switches that support it, is standard in modern offices and costs no more than 100 Mbps equipment.
Place the host computer physically close to the network router or switch and use a short, good-quality Ethernet cable. Long cable runs over 100 meters reduce the signal quality of a wired Ethernet connection and introduce errors that look like software problems but are caused by the physical cable. Standard Cat5e or Cat6 Ethernet cables support Gigabit speeds and are the correct choice for a QuickBooks host computer connection.
7. Firewall Configuration for QuickBooks Desktop
What the Firewall Must Allow
Windows Firewall controls which programs and ports are allowed to send and receive network traffic. QuickBooks Desktop uses specific numbered ports to communicate between the host computer and workstations. Port 8019 is the base communication port used by all QuickBooks Desktop versions. Each version also uses a set of three additional dynamic ports: QuickBooks 2024 uses ports 56728 through 56730, QuickBooks 2023 uses 56725 through 56727, and QuickBooks 2022 uses 56722 through 56724. Ports 80 and 443 must also be open for QuickBooks to reach Intuit’s servers for payroll updates and subscription verification.
Beyond port rules, the Windows Firewall must allow three specific QuickBooks program files to communicate freely: QBW32.exe (the main QuickBooks application), QBDBMgrN.exe (the Database Server Manager), and QBCFMonitorService.exe (the connection monitoring service). These three files are stored in the QuickBooks installation folder. Adding them as program-level exceptions in the firewall ensures they can send and receive data on any port they use, which prevents firewall blocks after Windows updates that change port assignments.
Using Database Server Manager to Configure the Firewall
Running a scan in QuickBooks Database Server Manager automatically configures the Windows Firewall to allow QuickBooks traffic. Intuit documents that the Database Server Manager scan repairs firewall permissions automatically — this means the scan adds the correct port rules and program exceptions without any manual steps. Run the scan on the host computer after every major Windows update, after every QuickBooks version upgrade, and whenever workstations start reporting H202 or H505 errors.
For manual firewall configuration, open Control Panel, click Windows Defender Firewall, and select Advanced Settings. Create inbound and outbound rules for the TCP ports your QuickBooks version requires. For each rule, select Port, choose TCP, enter the port numbers, select Allow the Connection, apply the rule to all three profiles — Domain, Private, and Public — and save the rule with a name like QBFirewallException_Inbound. Repeat the process for outbound rules using the same port numbers.
QuickBooks Firewall Port Configuration Reference
| QuickBooks Version | TCP Ports to Open | Where to Open Them |
| QuickBooks 2024 | 8019, 56728, 56729, 56730 | Inbound and Outbound rules in Windows Defender Firewall |
| QuickBooks 2023 | 8019, 56725, 56726, 56727 | Inbound and Outbound rules in Windows Defender Firewall |
| QuickBooks 2022 | 8019, 56722, 56723, 56724 | Inbound and Outbound rules in Windows Defender Firewall |
| All versions | 80, 443 | Required for payroll updates and Intuit online services |
| All versions | 56719 (fallback) | Automatically used if all dynamic ports are occupied |
8. Managing Company File Size for Network Performance
How File Size Affects Multi-User Performance
QuickBooks Desktop has no hard limit on company file size, but Intuit’s documentation is clear that performance decreases as the company file grows larger. Intuit specifically states that if the network cannot manage large data files, performance may experience issues. For QuickBooks Pro and Premier, community guidance from Intuit support consistently documents that company files begin to slow down noticeably at the 150 to 200 MB mark and become increasingly prone to data corruption and unrecoverable errors past 250 MB.
A large company file directly increases the time it takes to open the file across a network connection, run reports, switch between modules, and save transactions in multi-user mode. Every byte of the company file that changes during a save operation must travel across the network from the workstation to the host computer and back. A file that is five times larger than the performance threshold puts five times the load on both the network connection and the host computer’s RAM.
Using Condense Data to Manage File Size
The Condense Data feature in QuickBooks Desktop removes old transaction detail from the company file while keeping the summary totals for all accounts. Intuit’s advice for businesses experiencing performance issues due to file size is to use the Condense Data utility to reduce the file size. Access it by going to the File menu, selecting Utilities, and choosing Condense Data. Always create a full backup of the company file before running Condense Data, and run the process when no other users are logged into the company file.
Intuit recommends keeping at least two years of detailed transactions in the company file so you can compare reports and access prior-year project information. After condensing, the file retains summary balances for earlier periods but removes the individual transaction lines. Businesses that need to access detailed transaction history beyond two years should archive the older company file before condensing rather than removing that data permanently.
9. Backup Practices That Protect the Company File on a Network
Automatic Backup Configuration
QuickBooks Desktop can create automatic backups of the company file on a schedule without any manual action from the user. Set up automatic backups by going to the File menu, selecting Back Up Company, and choosing Create Local Backup. In the backup options window, select Local Backup, click Options, and configure the backup location — use a separate physical drive from the one that stores the live company file, so that a drive failure does not destroy both the live file and all backups simultaneously. Set a backup schedule under the Online and Local Backup section.
Intuit’s backup guidance confirms that QuickBooks can handle this automatically on your behalf. Automatic backups run according to the schedule you set — daily, every few days, or triggered by a specific number of saves. For a business that processes transactions every day, a daily automatic backup creates a clean restore point that is never more than 24 hours behind the current state of the company file. A company file that cannot be opened due to a 6000-series error can be restored from the previous day’s backup in minutes.
Where to Store Backups
Store backup files in at least two locations: one on a local drive attached to the host computer and one on a separate device or cloud location. A backup on the same hard drive as the live company file provides no protection against drive failure. An external hard drive that stays connected to the host computer and receives daily automatic backups provides one level of protection. A second copy stored off-site or in a cloud backup service provides protection against physical damage to the office, including fire or theft.
The backup file that QuickBooks creates has a .QBB extension — QuickBooks Backup — and can only be restored using QuickBooks Desktop. Name backup files with the date of the backup to make it easy to identify the most recent clean restore point. A naming convention like CompanyName_2024-06-01.QBB takes no extra effort to implement and saves significant time when a restore is needed under pressure.
10. Maintenance Checklist After Changes to the Network
Any change to the network — a Windows update, a QuickBooks version upgrade, a new workstation added, a change to the host computer’s IP address, or a move of the company file to a new folder — requires a post-change check to confirm multi-user access still works correctly. Perform these steps in order after any network change:
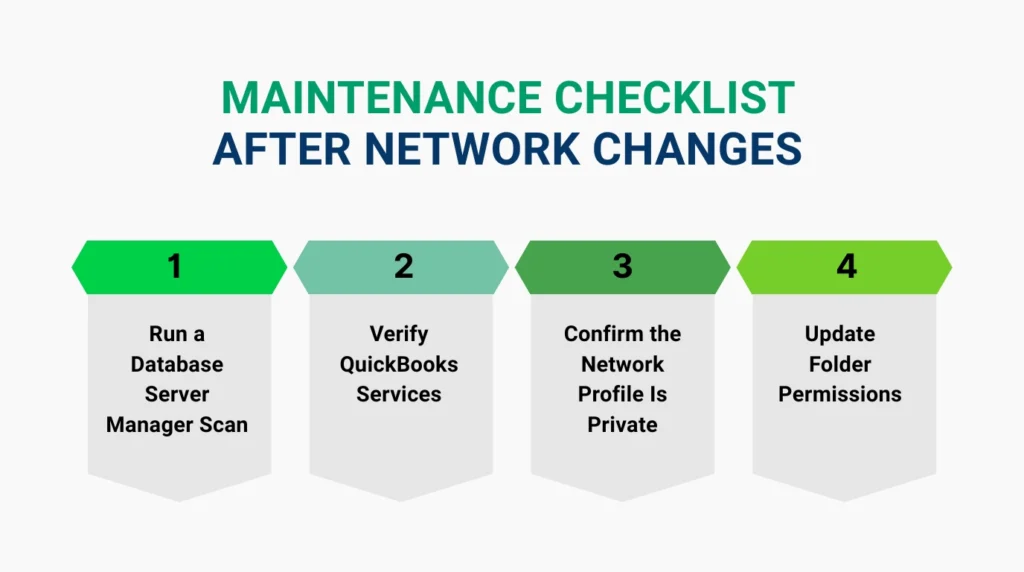
- Run a Database Server Manager scan on the host computer: Open Database Server Manager, confirm the company file folder is listed, and click Start Scan. The scan rebuilds the .ND file, restores firewall permissions, and confirms the hosting service is running. This single step resolves most post-change connectivity problems automatically.
- Confirm both QuickBooks services are running: Open services.msc on the host computer and confirm QuickBooksDBXX and QBCFMonitorService both show Automatic startup and a Running status. Set the Recovery tab for both services to Restart the Service on any failure.
- Verify the network profile on the host computer is Private: Open Settings, go to Network and Internet, click the active network connection, and confirm the Network Profile is set to Private. A Public profile disables Windows file sharing, which blocks QuickBooks multi-user access entirely.
- Update folder permissions after every QuickBooks version upgrade: After upgrading, open the company file folder Properties on the host computer, go to the Security tab, and grant Full Control to the new QBDataServiceUserXX account for the upgraded version. The new account does not inherit permissions from the previous version’s account.
- Test the connection from each workstation: Open QuickBooks on each workstation and attempt to open the company file in multi-user mode. A successful connection from every workstation confirms the post-change setup is complete and correct.
- Update QuickBooks to the latest release: Go to Help, then Update QuickBooks Desktop, and install all available updates on both the host computer and all workstations. Intuit releases product updates that address compatibility problems introduced by Windows updates and add stability improvements to the multi-user network.
- Run QuickBooks File Doctor if any workstation still shows errors: Download QuickBooks Tool Hub from Intuit’s official website, open it, go to Network Issues, and run QuickBooks File Doctor. The tool checks firewall configuration, .ND file integrity, hosting settings, and service status — and repairs each issue it finds automatically.
Conclusion
A stable QuickBooks Desktop multi-user network does not require advanced technical knowledge — it requires correct execution of a specific set of documented steps. The host computer must meet Intuit’s hardware requirements for the number of users it serves. Database Server Manager must be installed, scanned, and set to run automatically. Folder permissions must grant the correct service account Full Control access. The company file must sit on the host computer’s local hard drive, not on external or wireless storage. The Windows Firewall must allow QuickBooks traffic through its specific ports.
Each of these elements is documented by Intuit and verifiable in under five minutes. A network that has all five elements correct produces no H-series errors, no locked file messages, and no performance problems under normal business use. A network that is missing one element produces errors that keep repeating until that specific element is fixed, regardless of how many times the other elements are rechecked.
The fastest path to a stable network is to work through the setup in the order this article presents it: hardware first, then installation type, then Database Server Manager, then folder permissions, then file location, then firewall, then backup. Skipping ahead or treating symptoms without addressing the underlying setup gap leads to the same errors returning after every Windows update or version upgrade. Build the setup correctly once and maintain it with the post-change checklist, and multi-user access stays stable through normal business operations.
Frequently Asked Questions
Q1. How many users can access QuickBooks Desktop in multi-user mode at the same time?
The number of simultaneous users depends on which version of QuickBooks Desktop you have. QuickBooks Pro allows up to 3 users at the same time. QuickBooks Premier allows up to 5 users simultaneously. QuickBooks Enterprise allows up to 30 users at the same time. The host computer’s RAM requirement also increases with user count — Intuit documents 8 GB for 1 to 5 users, 12 GB for up to 10, 16 GB for up to 15, and 20 GB or more for 20 or more users connecting simultaneously.
Q2. Can the host computer be in a different location from the workstations?
The host computer and all workstations must be on the same local network to use QuickBooks Desktop multi-user mode. A workstation in a remote location — a home office or a different office building — cannot connect directly to a company file on the host over the internet. Remote users who need simultaneous multi-user access require a different solution, such as a private cloud hosting arrangement or a remote desktop connection to a computer that is on the same network as the host.
Q3. Do all workstations need a licensed copy of QuickBooks installed?
Yes. Every workstation that opens the company file in multi-user mode must have a separately licensed copy of QuickBooks Desktop installed. The number of user licenses purchased must match the number of computers that will simultaneously access the company file. Each copy must be the same version year as the copy installed on the host computer — mixing QuickBooks 2023 on a workstation with QuickBooks 2024 on the host produces connection errors.
Q4. How often should I run a Database Server Manager scan?
Run a Database Server Manager scan after every major Windows update, after every QuickBooks version upgrade, after moving the company file to a new folder, and after adding a new workstation to the network. Each of these events can change firewall rules, service account permissions, or the network address recorded in the .ND file. A scan after each event takes less than two minutes and resolves most network-related problems before they surface as errors during business hours.
Q5. Can QuickBooks Desktop be hosted on a wireless network for small offices?
Workstations can use wireless connections without significant risk, but the host computer must use a wired Ethernet connection. Wireless connections experience packet drops during normal operation due to signal interference. A packet drop during a transaction write on the host computer leaves the .TLG transaction log file in an incomplete state, which produces data integrity errors that require the Verify and Rebuild Data tools to repair. The host computer’s wired connection is the single most important physical setup requirement for a stable QuickBooks Desktop network.
Anusmita is a seasoned content writer who brings perspective to words. As a writer, she enriches her work with a journalistic aptitude, utilising her training in Mass Communication and Journalism. She loves to travel and explore, which imparts a greater sense of understanding, maturity, and experience that are reflected in her content.
Beyond her professional work, Anusmita enjoys painting, singing, dancing, and spending time planting. She is also a self-proclaimed foodie who loves exploring different cuisines, an interest that further adds to her curiosity and perspective as a writer.
Leave a Reply